Two Bears And A Bunny

Beatrice and Bernard are an inseparable pair that make for quick knit gifts! Cute too. :) | Two Bears And A Bunny - withwool.com

Beatrice and Bernard are an inseparable pair that make for quick knit gifts! Cute too. :) | Two Bears And A Bunny - withwool.com

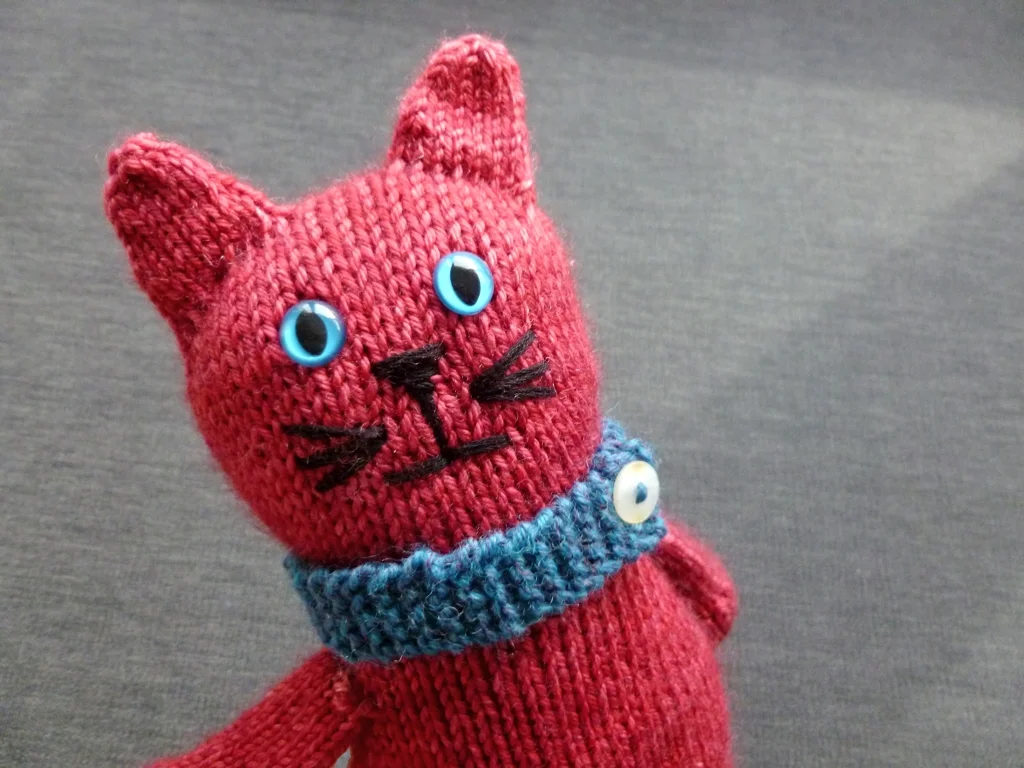
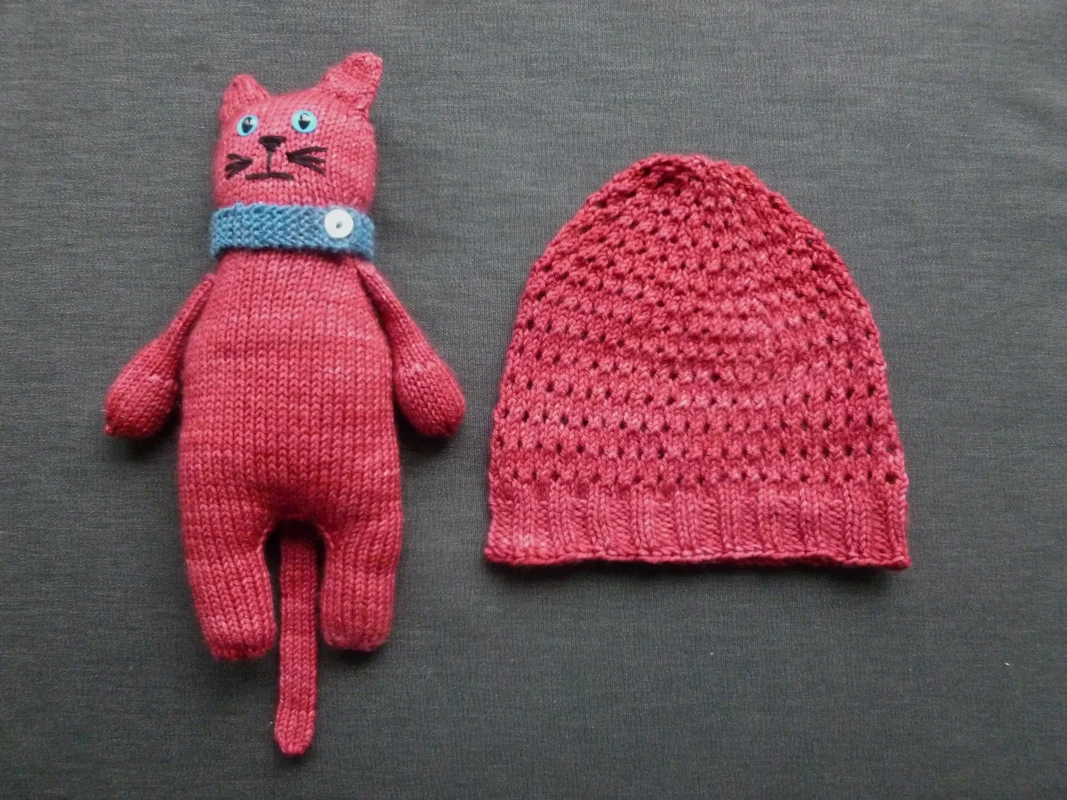
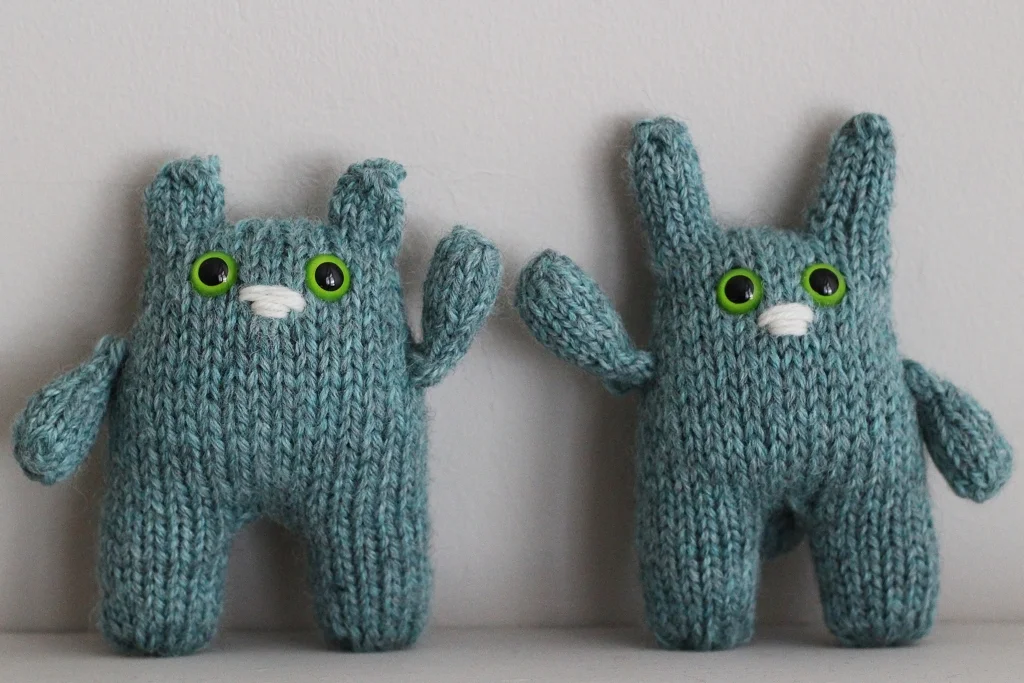
What do you make for a cute 1-year-old kiddo? A cute bunny and bear, of course. 

Once I decided to make Beatrice and Bernard, they almost seemed to knit themselves. I’ve made the pair before and used a few mods to make them even faster to put together: stuffing them as a go, knitting the arms from the paw up, and grafting the head closed. The only hard part was the making the grafting look nice. Scratch that, I lied. The hard part is sewing on the arms at the same height on both sides. I thought the bunny was almost finished until I got a good look at the arms after sewing them on. One of them was definitely higher than the other which meant I had to unpick the seam and do it again. The second time was the charm fortunately. 

After the pair had arrived in their new home, I got a text that they’d each gotten a kiss when they were unwrapped. Pretty sure that means I won Christmas knitting. :)

Beatrice and Bernard are an inseparable pair that make for quick knit gifts! Cute too. :) | Two Bears And A Bunny - withwool.com

Pattern: Beatrice and Bernard The Inseparable Bunny and Bear by Rebecca Danger

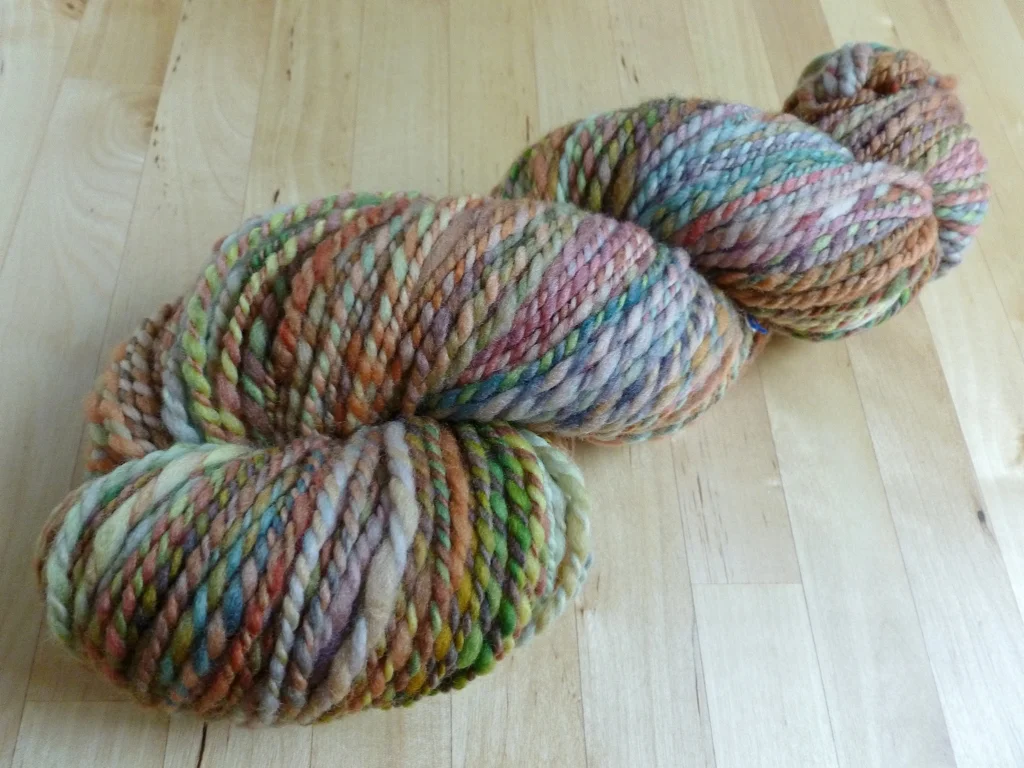
Yarn: 65 yds Knit Picks Wool of the Andes Superwash Bulky

Needles: US 5 (3.75 mm) circulars

Dates: November 24 - 26, 2015

@Ravelry

One adorably Christmas ornament coming up! | Two Bears And A Bunny - withwool.com

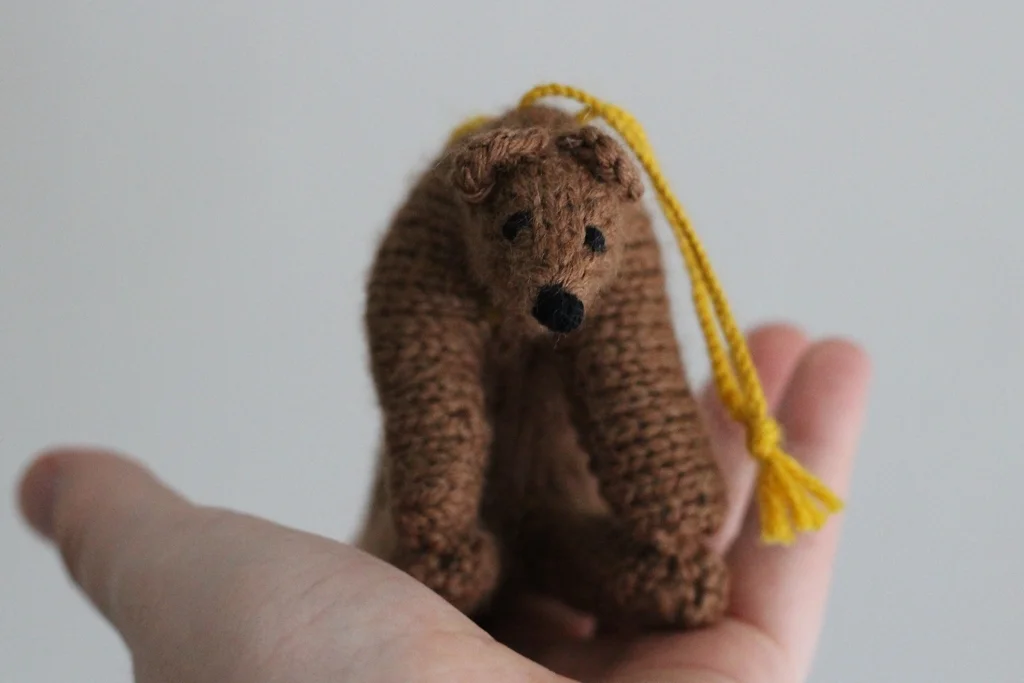
I slacked off in 2014, but I have a yearly tradition to make a new ornament for the tree every Christmas. The first ornaments were just an excuse to make cute things to go on the tree, but they’ve grown to tell a story over the years. That’s how I ended up making a stocking covered in palm trees and knitting a color work house among other things. When it came time to make an ornament for 2014, I never really figured out what I wanted to make or how to make it. The idea to knit the extinct California grizzly bear didn’t occur to me until 2015 gift knitting time. Thankfully, making it didn’t take anywhere near as long as it took for me to have the idea. 

Making the bear went quickly even though I essentially knit the pattern twice with the second attempt worked in the round. Then I couldn’t decide on the design for the embroidery. The bear sat to the side while I worked on other Christmas knits and ordered the yarn I wanted to use for the embroidery. Once I had the design sketched out, the final stitching went reasonably quickly even though I redid it a few times to make it neat. So, 2014 finally got its ornament.

As for the 2015 ornament, I have the yarn and an idea. I still have to work out the charts, but it’ll be a nice project for February even if it is a few months late. 

One adorably Christmas ornament coming up! | Two Bears And A Bunny - withwool.com

Pattern: Grizzly Bear Toy by Linda Dawkins

Yarn: 64 yds Knit Picks Gloss Fingering - Doe for the body and Honey for the embroidery

Needles: 2.75 circulars

Dates: November 13 - December 5, 2015

@Ravelry

One knit bear checking out the view. | Two Bears And A Bunny - withwool.com

FO: Crescent Over Lothlorien and The Dewberry Cowl

The Crescent Over Lothlorien Shawl was the first thing I knit from my 2015 holiday gift list. So pleased with how it turned out.  FO: Crescent Over Lothlorien and Dewberry Cowl - withwool.com

I decided to go all out with my gift knitting for Christmas 2015. The list started out small - less than 5 pieces - before growing and growing and growing just a little bit more. When all was said and done, I had knit a shawl, a cowl, a hat, 4 washcloths, a pair of slippers, 2 pairs of wrist cuffs, a bear & bunny duo, and one golden bear. Plus, there was that skein of handspun. This was a pretty ambitious list considering that I skipped holiday gift knitting the previous years. I’m pretty sure the only reason I was able to get everything done was because I’d committed to #yearofmaking, and had built a habit of making something every day. Even a few stitches a day can add up to something really big.

The Crescent Over Lothlorien Shawl was the first thing I knit from my 2015 holiday gift list. So pleased with how it turned out.  FO: Crescent Over Lothlorien and Dewberry Cowl - withwool.com

What do you knit for the lace knitter that loves fantasy and general geekery? Fantasy themed lace, of course! The Crescent Over Lothlorien Shawl fit the bill, and had the added bonus of a reversible stitch pattern. 

I had a few hiccups reading the pattern and had to rip out a few times - once all the way back to the beginning - but the knitting was fairly easy once I figured out the rhythm and quirks of the design. It was also my first time using Dream in Color Smooshy which was lovely. The shawl was also great tv knitting aside from that one time I really messed up the lace pattern. (Note to self: Don’t stay up to 2AM knitting lace. You’re just going to give yourself a headache and a giant time suck the next morning.)

The Crescent Over Lothlorien Shawl was the first thing I knit from my 2015 holiday gift list. So pleased with how it turned out.  FO: Crescent Over Lothlorien and Dewberry Cowl - withwool.com

I’ve said it before and I’m sure I’ll say it again, blocking is magic. Once the shawl was bound off with a ridiculously stretchy decrease bind off, it looked small and crumpled. Even knowing how blocking can transform a piece, I was still nervous that the finished shawl wouldn’t be a worthy gift. I needn't have worried. 

The shawl got a nice long soak before I stretched and pinned it to an inch of its life. Flexible blocking wires made shaping and pulling out the points so much simpler and quicker then working with only pins. Inserting the wires and shaping the shawl still took at least 30 minutes though. When that work was done, instead of a small and crumpled shawl, the crescent was long and delicate. The yarn overs had popped open, the columns were visible, and every leaf was distinct. Whew…

The Crescent Over Lothlorien Shawl was the first thing I knit from my 2015 holiday gift list. So pleased with how it turned out.  FO: Crescent Over Lothlorien and Dewberry Cowl - withwool.com

Pattern: Crescent Over Lothlorien by Cordula Surmann-Schmitt 

Yarn: Dream in Color Smooshy - Icy Reception

Needles: US 4 (3.5mm) circulars

Date: September 12 - October 23, 2015

@Ravelry 

I've wanted to knit the Dewberry Cowl since I first saw it, and it was a perfect pattern for gift knitting. FO: Crescent Over Lothlorien and Dewberry Cowl - withwool.com

The second gift knit was the Dewberry Cowl which I've wanted to make since I first saw it. I like the combination of lace and garter stitch. I like the shape and how it’s worn. I liked how it could be a showcase for lots of different yarn. Plus, I thought the recipient would like it too which is always an important thing to consider when making gifts. Can’t just make stuff you like after all.

It was a pretty quick knit even considering that I had to rip it out - totally my own fault - and make it bigger. The pattern calls for an aran weight yarn, but I mistakenly picked out a DK weight instead. Mrs Crosby Carpet Bag is a beautiful silk wool single and I don’t regret picking it at all. 

I've wanted to knit the Dewberry Cowl since I first saw it, and it was a perfect pattern for gift knitting. FO: Crescent Over Lothlorien and Dewberry Cowl - withwool.com

Mailing these goodies off was hard but, I’ve got the patterns and plenty of worthy yarn. I already have the perfect skein picked out for my Dewberry.

Pattern: Dewberry by Hillary Smith Callis 

Yarn: 1 skein Mrs Crosby Carpet Bag - Hollywood Cerise

Needles: US 6 (4mm) circulars

Date: October 26 - November 4, 2015

@Ravelry

Smokestack Socks

I’m pretty sure that hidden away in all the math that is knitting there’s a simple equation which reads: give hand knit socks = get hand knit socks. I’ve gotten a few pairs of comfy, well-fitting socks as gifts from one particular knitting friend, and it was past time I equalized the equation. 

Step 1: Buy sock yarn in her favorite colors. I took a chance on Knit Picks Hawthorne and picked up a skein of the Fingering Multi in the Vancouver colorway.

Step 2: Snoop through her Ravelry queue to find out what she likes in a sock. Cables popped up quite a bit which lead me to pick the Smokestack Socks by Tanis Lavallee. The pattern has been in my queue to knit for myself for awhile but I also picked it because of the cables and how easy it looked to modify the stitch count. Just as important was how the pattern looked with variegated yarn which, thanks to Ravelry, was quick to see.

Step 3: Wind the yarn.

Step 4: Actually knit the socks. This is easier written than it was done because of how many times I ripped out. Not the patterns fault at all; it was all me. The Smokestack Socks are written to be knit from the cuff down, but I worked them toe-up as I knit all of my socks. The first ripping came when I found out how small knitting friend’s feet are. The rest of the sock was smooth sailing asides from the moments I tinked back to add the purl ridges or cross a missed cable. 

The second sock was not as forgiving. I cast on, knit the toe, worked the foot, increased for the gusset, turned the heel, and was working the heel flap when I noticed that it was too long. By almost an inch and there’s no fudging that. I measured and my gauge had increased by 1 row/inch; nothing else changed except the speed I was knitting. That’s what I get for rushing. At least I had the company and sympathy of a few knitting buddies when I ripped all the way back to the toe. Thankfully, my gauge cooperated for the second attempt. 

Step 5: Wash the socks. No problems here.

Step 6: Mail the socks. The package arrived over the weekend and I got a photo of the socks on her feet. Social media is pretty awesome like that. All the ripping and re-knitting was worth it because they’re a perfect fit. #knittingwin The equation is equal, and now I get to knit a pair for myself in green. 

The Specs

Pattern: Smokestack Socks by Tanis Lavallee

Yarn: 204 yds Knit Picks Hawthrone - Vancouver (204 yds)

Needles: 2.25 mm circulars

Dates: April 3 - 21, 2015

Full modificaitons listed @Ravelry

Pattern: Cuddly Chevron Baby Blanket

Cuddly-Chevron3.jpg

Early last year I found out that a good friend of mine was having her first child. Since she’s on my knit-worthy list, my mind started churning with all sorts of ideas. I considered sweaters, hats, toys, and baby tube socks. All of those things are still an option now but what what I really wanted to make was a blanket. Sure, it’s more knitting, yarn, and time than the other ideas but a blanket has staying power. It can’t be outgrown like a sweater or a hat or adorable baby tube socks. A blanket is more useful than a toy and, maybe, not as easy to misplace. Plus, if you pardon the cliche, a great way to wrap someone up in love.

Cuddly-Chevron4.jpg

Those thoughts were the start of the Cuddly Chevron Baby Blanket. I swatched my way through several different and complicated ideas, none of which panned out, before coming back around to the simple chevron. Soft, cushy, colorful garter stitch chevrons, in fact. After tracking down a machine washable cotton/acrylic yarn that actually had all the colors I needed, a task that proved much harder than I thought, I cast on. Then I ripped out because I wanted the blanket to be bigger. After that, the knitting was smooth sailing. I didn’t finish the blanket in time to send it off before the kid was born but it did arrive before winter turned really cold. 

My original plan was to publish the pattern before Christmas. Obviously that didn’t happen but I’m so happy that Cuddly Chevron is the first pattern of 2015. The first of many! Another first and something I’m really excited about is that I’m going to be releasing a tutorial series detailing the techniques in this blanket! I’ve never released tutorials revolving around a specific pattern before and can’t figure out why I haven’t. The tutorials will focus on several key techniques that will help with both with the blanket and future projects. The series starts next week and will cover weaving in ends as you go (without a tapestry needle), working lifted increases in garter stitch, and uses for stitch markers. If you’re wondering how to work another technique, let me know. 

Happy Knitting! 

Cuddly Chevron Baby Blanket

Simple, classic, and warm, the Cuddly Chevron Baby Blanket is easy to make and a great gift for any baby or yourself. Worked in garter stitch, the blanket knits up quickly to create a cushy fabric. 

Stick with three colors of worsted weight yarn, just use two, or go wild and use up all those leftover yarns in your stash.

Want to make it bigger or smaller? The pattern includes notes to help you out. 

Size: 30” x 30”

Needle: US 7 (4.5 mm) 36” circular needle

Yarn: Cascade Yarns Avalon - 2 skeins (350 yds) of each color

C1: 10 - Artisan's Gold

C2: 02 - Silver

C3: 17 - Enamel Blue

Notions: Tapestry Needle, Stitch Markers (Optional)

Check it out on Ravelry!

The Cat And The Hat

Say hello! This vermillion kitty cat doesn’t have a name yet but he (she?) is heading to a new home for the holidays.

Will there be catnip, snuggles, and tea parties? This cat does love a good tea party.

Traveling with the vermillion cat is a matching hat. Since I knit the hat in the 18 month - 4 years size, I was able to make both from one skein of Tosh Vintage. Even had a few yards to spare. I knit the cat mostly as written with the few mods I used detailed here. The collar is garter stitch and 5 stitches wide with a yarn over buttonhole. The hardest part of the whole pattern wasn’t the knitting but embroidering the face. Ripped out the nose and the whiskers several times to create just the right expression. 

 If you’re looking for safety eyes to use on your toys and softies, I recommend 6060 on Etsy. The selection for safety eyes - cat, round, or handpainted - and safety noses is amazing. There are plenty of different sizes and colors to choose from at reasonable prices. I picked up a 12mm variety pack of 5 different colors so I could pick out the eyes that would pop best on the vermillion yarn. Plus, my order shipped quickly so I’ll definitely be ordering from that shop again. 

Cat Pattern: Greta the Captivating Cat by Rebecca Danger

Hat Pattern: Slouchy Babe Hat by me - Download it here

Yarn: Madelinetosh Tosh Vintage - Vermillion

Spinning Malabrigo Arco Iris

When this skein was freshly dry from its bath, it was my absolute favorite. One Tour de Fleece and a few more skeins of handspun later, it’s still my favorite. The colors are amazing, the yarn is ridiculously soft, and it has great density.

Way back in June, I was ready to spin Arco Iris but had no clear vision of how. So the fiber got to lead the way. Once I unbraided the bump, it was clear that was absolutely no chance of spinning identical singles. The colors were randomly dyed without a single discernible repeat. Spinning a 3-ply was out because it would muddy the colors. Chain-plying was out too because I wanted as much yardage as possible. Instead of going through some fiddly process, I decided to keep things simple since the colors were complicated enough all ready. Split the fiber in half lengthwise and spun the 2 pieces from opposite ends. Then I plied, let the yarn rest on the bobbin, and dunked it in the sink with some Eucalan. The only handling the wet skein got before hanging up to dry was a few pops over my hands. No thwacking against a shower wall or other stress relief.

The soak plumped up the yarn considerably. Before the bath, the yarn averaged 9 WPI, basically a worsted weight. The bath turned into an aran weight with an average of 8 WPI. It’s still a much denser yarn than I usually spin. The past few months have seen me trying to spin thinner and thinner yarns which usually meant double-drafted woolen creations. For whatever reason this bump of fiber wanted to be heavy and smooth. I’m not one to argue with wool so I went with it. Spun it inchworm style and went against every screaming urge I had to draft it finer. Sometimes I let to much twist into the fiber and snapped the single. Sometimes I had a good flow going. Drafting inch-worm is definitely something I still need to practice. The resulting yarn is a bit thick and thin but plying fixed many of its ills.

The yarn was content to sit on the shelf for the past few months but no longer. I might gotten a little distracted from writing the first draft of this post looking at cowl* patterns. After an exhaustive search through Ravelry and Pinterest, Present by Mademoiselle C wins by a landslide. The cowl looks like fun travel knitting and a great showcase for handspun. Not going to wait to get started.  


The Specs

Fiber: Malabrigo Nube - 4 oz Merino

Color: Arco Iris

Yardage: 202 + 29 yds

Dates: June 22- July 2014


 *I’m a little late joining the cowl party.

Journey of the Aviator Hat

Now that this aviator hat has gone on its own cross-country journey, I can finally write about it. Knit for a brand-new baby boy, it was an easy knit that came out adorable. The hardest part was picking just the right buttons. My only mod was to tack down the corner edges of the front flap so it didn’t stick out due to sturdy button stitching. Thanks to the multiple sizes, all the way up to an adult small, I’m sure I’ll be making many more for both boys and girls.

It wasn’t until the hat was in front of the camera that I noticed something. The hat was staring back at me. Now I can’t un-see that face with it’s stubby legs and bulky body. What does it want? Cuddles, I hope, and maybe cookies. When I picked out this pattern, I never noticed the face. It was just a cute hat. To be fair, it’s still a cute hat and not all of the finished projects on Ravelry look like silly creatures. I’m glad this one does though.

The Specs:

Pattern: The Journey of the Aviator by Gabrielle Danskknit

Yarn: Rowan Pure Wool Worsted - Electric (143)

Needles: US 7 & 6

Dates: July 17 - August, 2014

@Ravelry

Wander the Web 50

Inspiring, fun, thought-provoking, and crafty links to round out the week and jumpstart your brain.

A couple of days ago, I found a box sitting outside my steps. Inside were lots of Happy Birthday! goodies and a comfy pair of hand knit socks. I’ve wanted to knit Hermione’s Everyday Socks for years and Cece beat me to it. Thanks, Cece! They’re awesome socks.

A great primer on different wools and fibers aimed at spinning the perfect sock yarn. 

Make something small every day.

“Great people do things before they’re ready.”

Lucy Sparrow hand stitched 4,000 items -beer, magazines, candy bars, what have you - to stock a corner store.

DIY Natural Dyes Chart - focused on fabric but would probably work for yarn too

Surprise Stash

Last week, entirely of his own free will, The Bearded One went to a yarn shop to buy me an anniversary gift. That’s love for you. The people working there made sure he knew all about the shop’s return policy. Don’t worry, yarn shop people, he knows what I like and I’m not returning a single thing.

The first thing I unwrapped was a bump of Malabrigo Nube in Arco Iris. It is unbelievably soft and the colors are lovely. Can’t decide if I should spin it up as soon as the current proto-yarn is finished or wait until Tour de Fleece. Should probably figure out what I want the end project to be first. Cowl? Shawl? Hat?

Next up, 2 skeins of Malabrigo Silky Merino. Just like the Nube, it is ridiculously soft and the colors are wonderful. The added silk gives the yarn a beautiful luster. Couldn’t help perusing Ravelry to find the perfect pattern and I didn’t need to search long. The Duotone Cowl is a simple striped cowl that’ll show off the yarn and be great mindless knitting. Really, I’m surprised I haven’t cast on already.

Garterlac Dishcloths

Fairly sure that I’ve fallen down the Entrelac rabbit hole. The day started innocently enough when I went looking for pattern that would look great with variegated yarn. My first choice, Grandma’s Favorite, pooled catastrophically. My second choice, the Garterlac Dishcloth, seemed like it was made for variegated yarn. The pattern had been in the queue for years. Why not not try it? Little did I know that I was standing on the edge.

Casting on was simple. As were the crumpled looking edge triangles. Then I knit a square and then another and another. In no time at all, I was working the bind off triangles and weaving in ends. Picking up stitches be damned, knitting entrelac was fun! I was officially falling down the rabbit hole and it was awesome.

I was so tempted to keep these for myself but into a box and off they went to their new home. Going to be knitting a lot more cloths so I’m sharing the entrelac love. After all, it’s a perfect use for my giant stash of kitchen cotton. 

If you’ve never tried Entrelac knitting before, this pattern is a good place to get your toes wet. It’s well written and easy to understand. The cloth is small and quick so you’re not investing a lot of time trying a new technique; however, it’s still large enough to know if you enjoy working Entrelac. Doesn’t take much yarn either - less than 60 yards, about 30 grams, of worsted weight cotton. Plus, the cloth looks very impressive and much harder to make than it actually is. If you can knit, pick up stitches, and work kfb and k2tog, you have everything you need to get started.

The Specs:

Pattern: The Garterlac Dishcloth from Criminy Jickets

Yarn: Knit Picks Dishie Multi - Nettle

Needles: US 6 (4mm)

Dates: May 6 - 9, 2014

@Ravelry 

Frisson Shawl

When I first saw the Frisson pattern, I was instantly smitten. I liked the shape and the size and the points. I liked the combination of garter stitch and eyelet wedges. It looked like an easy knit that wouldn’t be too boring, what the Knitmore Girls would call ‘autopilot knitting’. To the top of the queue it went and, when I decided to knit a shawl for a friend’s birthday gift, Frisson beat out all the other options.

The knitting was definitely easy since the pattern was well written and easy to follow. Addicting too because the points just seemed to show up on my needles when I wasn’t looking. I’d knit one point and just have to knit another. Eventually, the rows got long enough that I couldn’t knit a whole point in one sitting but it was still really fun. If I hadn’t dropped a knee on my circular needle and snapped it at the join, I would have finished the shawl a lot sooner. Lesson learned though. Don’t leave knitting needles on the bed. 

Even after knitting one as a gift, I still want to make a second one for myself which is the sign of a great pattern. Have the yarn picked out and everything.

Another reason this shawl was such a great yarn to knit was the yarn. Twist Heavenly, a blend of superwash merino, cashmere, and nylon, is a local yarn hand dyed in Manhattan Beach at The Twist Yarn Shop. The yarn is wonderfully soft and has great drape. The colors are beautiful and knit up well too. Even with the long rows of garter stitch, there was no flashing and the colors barely pooled. One skein of Heavenly wasn’t enough to knit the full shawl but, with 12 points, this Frisson is still a perfect size to wear as a scarf.

The Specs: 

Pattern: Frisson Shawl by Brittany Wilson

Yarn: Twist Yarns Heavenly - Geode 

Needle: US 5 (3.75 mm) Circular

Date: February 23 - March 31, 2014

@Ravelry

Peppercorn Bracelet the Second

On the same day I wrote about the first Peppercorn Bracelet, my mom sent me an email asking me to make one for her too. My Mom’s absolutely awesome so she went to the top of the list. When I was out and about searching for yarn, I found the perfect bronze-colored glass beads in a yarn shop. A good trip.

This Peppercorn Bracelet worked up even faster than the first. Using the recommended number of beads will do that. The second reason was because I switched to a crochet hook instead of using double pointed needles. Working fine hemp cord with the DPN’s was hard on the fingers. The needles poked holes in my skin and left my finger tips sore. Using a crochet hook made the whole process pain free and wonderfully fast. I was able to finish the whole bracelet in an afternoon instead of having to space the work out over several days. 

After making two of these, especially from hemp, I can tell you that there is one step that absolutely can not be skipped - blocking. When the bracelet is fresh off the needles or the hook, it’s going to twist and curl up on itself. It won’t lay or hang well and it certainly won’t look its best. The one minute it takes to block the piece is well worth it. Put the bracelet under water just long enough to get it wet. Tug the ends a few times to straighten it out and hang the bracelet up to dry. That’s it.

The Specs

Pattern: Peppercorn Bracelet by Kourtney Robinson

Yarn: Fine Hemp Cord

Beads: Mill Hill size 6/0 seed beads, 16606

Hook: 2.75 MM

Heather Holiday Handspun

Handspun-Ashland-Bay-Merino-Yarn.jpg

We’re still talking about Christmas gifts, right? Because I’ve got my last skein of 2013 handspun to show off. This particular yarn, the only yarn I gave away last year,  was spun for a friend who knits beautiful lace shawls that seem to pop off the needles every time she turns around. Plus, the last time I gifted her some handspun she immediately knit it into a cowl. I think she must have cast on for it as soon the package landed on her doorstep. So, she deserves handspun yarn and I went on the hunt for soft fiber in the perfect color.

Handspun-Ashland-Bay-Merino.jpg

Once the goodness, Ashland Bay Multi-Colored Merino, was in hand, I was ready to spin but not just any old yarn. I wanted to replicate one of the first skeins to come off my wheel, a soft DK weight 2-ply spun from the same fiber. That teal yarn demanded to be knit as soon as it came off the bobbins but I haven’t found the right pattern yet. To recreate said yarn, I split the fiber in half, set the wheel up with the same ratio and tension, and got to spinning. The final product wasn’t exactly the same but it was awfully close. Instead of a DK, it was a sport weight. Instead of 300 yards, there were 464. Sounds good to me. 

Baltic-Blue-Handspun.jpg

The Specs

Fiber: 4oz of Ashland Bay Multi-Colored Merino

Color: Baltic

about 12 WPI post washing

464 yards

Spinning a heathered top was a new experience for me. Up to that point, I’d only worked with solid and hand dyed fibers; neither behave quite the same as a heather. The heathered top and the final yarn look very different since drafting the fiber further blends the colors. I wasn’t exactly sure what I’d end up with so I just went with it. The yarn is definitely still blue but you can see yellow, red and purple up close. I love the nuance and want to spin a whole sweater’s worth of this fiber. That’s definitely a first. 

Pattern: Cornered Slouch Hat

Cornered-Slouch-Hat-Profile.jpg

A quick, simple hat pattern is a great thing to have up your sleeve whether you have a great yarn or just 2 more knitting days until Christmas. Simple cast on. Simple ribbing. Simple stockinette. Simple crown decreases. Simple finishing. Let the yarn do all the hard work. 

I designed the hat to showcase a marled orange and blue beauty of a skein. The yarn was originally a pooling mess of fingering weight that I chain plied to create a lovely, marled aran weight. You can easily use any aran yarn that’ll give you 4 stitches to the inch or ply your stashed fingering weight yarn with the help of this tutorial

Cornered-Slouch-Hat.jpg

Cornered Slouch Hat

Sometimes, all you want is a simple, slouchy hat. Knit up a fun yarn or show off some handspun. This simple pattern with squared decreases is the perfect display for your favorite yarn. 

Thanks to the stretchiness of ribbing and stockinette, this hat will fit a wide variety of noggins. 

Sizes: 21” and 23”

Yarn: 110 - 130 yds of aran weight yarn

Needles: US 7 (4.5 mm) needles

Download Now

Cornered-Slouch-Hat-Decreases.jpg

Counting Down

Just 15 days until Christmas, my dear knitting friends. I hope you're way ahead on all you're projects or at least close to being done. There's just one more thing on my very short knit list, a small ornament, and it should be finished by the weekend. I hope. 

If you're looking for a quick, last-minute gift, I recommend simple hats, mitts, washcloths, and sport weight socks.  They're great tv knitting and you can wrap them up in no time at all. 

Tips for Christmas Knitting

BlueRide-Kaleidoscope_WarEagle1.jpg

 I hate to break the news but it’s September and summer is unofficially over. Now for the worse news. There are only 112 days until Christmas, 108 days until Winter Solstice, and a scant 86 days till Hanukkah. Please don’t hurt me, I’m only the messenger. 

I come bearing a few tips to make knitting and crafting through the coming months a little easier. The holiday season is filled with enough stress and knitting should help reduce instead of add to it.

  • Plan your projects. Write a list of everyone you want to knit or craft for and what you’ll be making for them. Planning this stuff out now, will spare you the hassle of figuring it out later. The list doesn’t have to be finished in one sitting. You can add or subtract from it as you go. Just don’t add too much later.  
  • Make a schedule. Set some realistic goals and build your stockpile of awesome knitted gift goodness over the coming months. Start the big stuff now to get it out of the way and give yourself an extra boost when you finish. Leave the small potato chip knitting that you can’t put down for when you feel like doing anything but knitting.
  • Gather your supplies. Need yarn, needles, or random notions? Buy it or find it and put everything in one place. When you’re ready to start a new project or finish one, you’ll have everything you need. There are better things to do at midnight than rummaging around for a tapestry needle. Like sleeping or watching Doctor Who marathons. 
  • Start now. You don’t have to cast on right this minute but start thinking and planning your projects when you still have the breathing room.  

I’ve only just started my holiday knitting/crafting list and winding the first skein of yarn. It’s a pretty short list and will probably stay that way. Anyone have grand plans or ideas for the next few months?

BlueRide-Kaleidoscope_WarEagle2.jpg

A Slouchy Baby Hat

SlouchyBaby2.jpg

All of my current knitting is large, complicated, or a slog. It was a nice change to knit a cute and, importantly, little hat for a friend’s new baby. Did I mention it was little? For the pattern, I turned to a cute and simple hat I published last year, the Slouchy Babe.

SlouchyBaby1.jpg

I made a few modifications to the pattern because, apparently, I can’t knit any pattern as written. Not even my own. First change was the yarn. I went with Cool Wool which is a DK instead of worsted. I love using Cool Wool, a 50/50 blend of wool and cotton, for baby items because of the yarn’s soft feel and lovely drape. You can even through it through the washing machine, though I generally hand wash, if push comes to shove. To make up for the thinner yarn, I increased to 88 stitches since the gauge was closer to 4.5 sts/inch than the pattern’s 5.25 sts/inch. My last change was knit the body to 6.75” before the ribbing for a little extra slouch. 

You can download the Slouchy Babe pattern here. It comes sized for newborns, toddlers, kids, and adults. The Slouchy I made for myself is one of my favorite hats.

SlouchyBaby3.jpg

Wander the Web 6: Link Love Edition

Once again joining up with Crafty Pod and Link Love to share goodness from across the web. This week’s theme stays close to home and focuses on the most popular posts from yours truly. When I first read through the schedule several weeks ago, it got me thinking about how I haven’t made many tutorials in the past few months. That had to change so I started brainstorming and writing and photographing and editing. In the past two weeks I’ve managed to post two tutorials, How to Ply Leftover Singles and How to Clean Dye Off Spindles, and have a few more in the works. 

While I’m working on the new stuff, check out my most popular tutorials.

ButtonTutorial2.jpg

How To Sew On A Button With Yarn - Can’t find matching thread? Use yarn from your knitting or crochet project to sew on buttons without extra bulk. 

KumihimoBraid.jpg

Kumihimo Tutorial: Part One and Part Two - A step-by-step tutorial for making a round kumihimo braid complete with clasp.

PlyingOrigami.jpg

Origami For Plying - Learn how to fold a simple origami star to help ply yarn off a spindle.

AfterthoughtHeel.jpg

How to Knit Afterthought Heels - A how-to and tips for knitting afterthought heels that won’t suffer from gaps or require picking up stitches. Bring your scissors!

Make A Bow Label.jpg

Make a Bow Gift Tags - Use leftover yarn and bits of cardstock to make care labels and tags for knitted and crocheted gifts. 

Tricolor Elephant

CrossStitchElephant1.jpg

Have you ever seen something and instantly thought of someone? The first time I saw the elephant cross stitch from Red Gate Stitchery I thought of my friend Cece. My second thought was that I absolutely had to make this for her. She loves elephants and I enjoy cross stitch so everyone wins. 

The stitching was easy once I choose the colors and seemed more like moving meditation than handwork. After concentrating on one small segment of stitches and than another, my eyes would zoom out to see the pattern and the elephant slowly forming. Almost seemed like the thread was stitching itself. Almost.

Part of the reason this project was so easy was because of the chart. It was easy to read and took up most of the page. Also helpful was the 4 pages of tips, tricks, and tutorials that came with the pattern. I’m still pretty new to cross stitch and those pages answered several nagging questions I didn’t even know I had. Plus, the whole thing arrived quickly to my inbox. What’s not to like?

CrossStitchElephant3.jpg

Presented for your inspection, the wrong side of the piece which I think is just as interesting as the front. The back is messy with ends sticking up everywhere but the pattern is still visible.

CrossStitchElephant2.jpg

The hardest part of this project was making myself iron the piece and figuring out how to frame it in a hoop. I managed to cheat my way out of ironing with warm water, a sponge, and colorfast thread. As for finishing the back, I did a little research and then promptly did my own thing with some leftover thread and wool felt.

Now that the elephant has arrived at his new home, I’m on the lookout for a new project or I could just finish the last one I started. Decisions, decisions.