How To Do The Long Tail Cast On And Helpful Tips

The Mosaic Sisters pattern- a set of colorful mosaic knit kitchen towels, washcloths, and coasters - is here! Meet the sisters and get the pattern.

Check out the other tutorials for the Mosaic Sisters: Mosaic Knitting 101 & Stripes And Carrying Yarn Up The Side


The long tail cast on was was one of the first cast ons I learned after branching out from the backwards loop cast on that most new knitters learn right off the bat. After years of knitting, the long tail method has become one of my favorites and my default cast on when a pattern doesn’t ask for a specific method. It’s stretchy, makes a tidy edge, and works up quickly once you get the hang of it. It can be worked in knit, purl, or ribbing (this tutorial focuses on the knit version). 

The long tail cast-on creates the first row of your work - which is why I especially love this cast on when working with non-stretchy yarns like cotton or linen which can be hard to start from a backwards loop cast on. Having a row already made is also great for when you join to knit in the round because it’s much easier to check that the stitches haven’t twisted around the needle. Plus, if you mess up and knit too many rows like I did on a recent project, you can even un-pick the cast on to fix the mistake. The process is a little finicky, but completely doable. 

Even better, for all of this long-tail goodness, all you need are needles and yarn. 

Getting Started
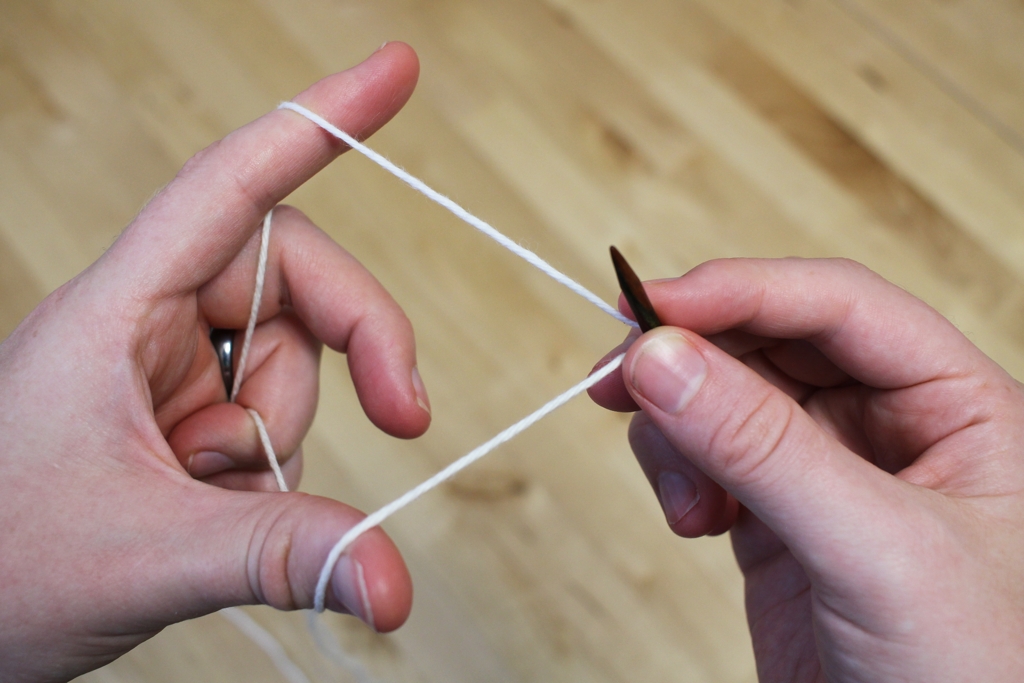
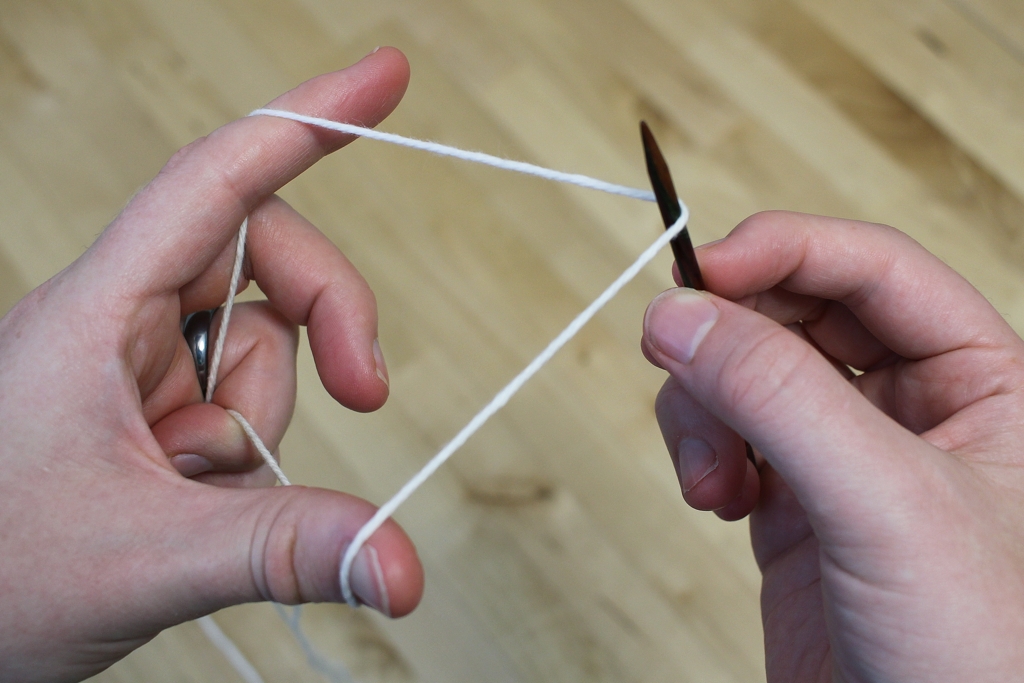
Pull the yarn over the needle with the tail end to the front. There’s no need to tie a knot. The photos above show how to hold and position yarn on the needles with and without my fingers in the way. Hold the yarn in your left hand with the tail end of the yarn over your thumb and the working end over your pointer finger. The needle goes in the middle. The yarn over your thumb becomes the bottom edge and the yarn over your pointer finger becomes the first row.

How much yarn do you need to pull out? Eventually, you’ll be able to eyeball the amount, but a good trick is to cast on 10 stitches, then unravel to find out how much yarn they used. Multiply the amount and had a few inches to weave in later and you’ll have a good estimate. 

Here’s an interesting fact: if you reverse positions and hold the needle in your left hand and the yarn in your right, you’ll make purl stitches instead of knit stitches. 

The 4 Steps To Make A Stitch

How to make a stitch with the long tail cast on. Also, gifs are perfect for when you don't want to watch an entire video.

How to make a stitch with the long tail cast on. Also, gifs are perfect for when you don't want to watch an entire video.

There are 4 distinct steps to make a stitch which seem complicated at first, but your hands will learn. Cast on enough stitches and you won’t even have to think about doing them. I exaggerated the motions to make the steps clearer, but I usually work with much smaller and faster movements.

Step 1: Bring the yarn in front and up underneath the yarn in front of your thumb. This is the loop that will secure the stitch. 

Step 2: Move the needle behind the forward strand on your pointer finger from right to left.

Step 3: Move your thumb backwards which bring the the loop over the needle and the yarn.

Step 4: Take your thumb out of the loop and pull on the front piece of yarn to secure the stitch.

Repeat those 4 steps until you have all the stitches you need on the needles and your first row. If you’re working in stockinette, purl the next row.  

When Casting On Lots of Stitches…

The main complaint about the long-tail cast on is when making a lot of stitches. I’m going to be conservative and say 50 stitches and up. If your yarn estimate is off, you’ll have too little yarn and have to rip out to start again or too much yarn and have a long tail hanging off the end of your work. To avoid both of these hassles, work the cast on with two strands of yarn instead of one.

You don’t have to knot them together either. Just hold the ends in place on the needle with your fingers. Once the first 2 stitches are on the needles, the yarn is secure and isn’t going anywhere. When the cast on is finished cut the front strand of yarn long enough to weave in. Yeah, it’s another end to weave in but it’s still less time and energy than having to repeatedly redo the cast on.

Tangle Free Circular Needle Storage

Learn how to wrap circular knitting needles and cables to keep them neat, tidy, and tangle free. | withwool.com

I’ve been knitting a lot during the past few weeks so I’m not making hats, mitts, toys, and ornaments during the wee morning hours of December 25th. The pile of gifts has gotten taller but my circular needles and extra cables are a tangled mess. I needed to pull a 2.75 circ out of the bag they’re all crammed in and ended up with all of them in my lap. Ugg. Then I had an idea. Why not coil them the same way as flexible blocking wire?

A video posted by April Klich (@aprilklich) on

Before, my knitting needles were a mess, but now they’re neat and tidy. I can actually grab just the one I want - it’s the small things in life. This trick works well on interchangeable cables too. I’m just got to make myself coil all of them up. 

How To Weave In Ends Without A Tapestry Needle

Learn how to weave in ends without a tapestry needle as you knit! | withwool.com

There are two great reasons to learn how to weave in ends without a tapestry needle. One, you don’t have to stop knitting to look for that one tapestry needle which has probably wandered off already. Where do they go? Ahem. Two, you can weave in ends as you go instead of putting it off until after the bind off or, if you really loathe working them in, never doing it all. 

Learning to weave in ends without a tapestry needle can be finicky the first few times you do it, especially if you’ve never done color work, but it’s worth the effort. Not only does it save time during finishing but it’s also versatile. You can use it with stockinette, garter, and in pattern. It still works if you’re increasing and decreasing. The ends will follow the curves and angles of short rows and chevrons without creating extra bulk. While it is noticeable on the wrong side, weaving in ends sans needle is neat and tidy. Plus, it even works with slippery yarns.

Sounds pretty cool so far, right? I thought so too which was why I used this method to weave in the ends when I switched colors on the Cuddly Chevron Baby Blanket. The deadline for that blanket left me in a dust with half finished knitting and weaving in the ends without a needle as I went cut out one last step at the end. 

Step By Step

Learn how to weave in ends without a tapestry needle as you knit! | withwool.com

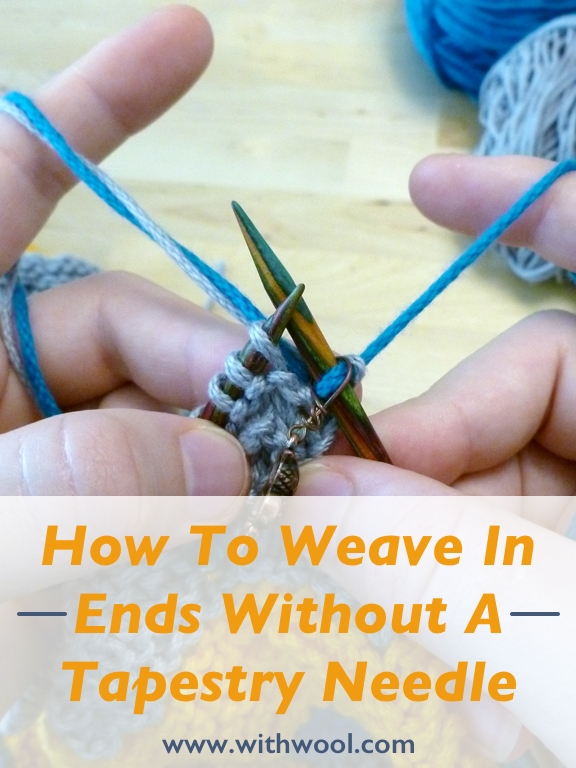
efore we get started, there’s one you need to know that’ll make learning this technique much easier. It might seem like you’re just knitting as usual with the new yarn but it’s actually wrapping around the tails as you move them back and forth.

Learn how to weave in ends without a tapestry needle as you knit! | withwool.com

When it’s time to switch colors (or time to add another ball of yarn), work one stitch in the new color. The tail should be about 6” so you have enough yarn to hold on to.

Learn how to weave in ends without a tapestry needle as you knit! | withwool.com

In the opposite hand of your new yarn (if you have the dexterity to do all this with one hand, mad props), hold the tails of both colors together.

Learn how to weave in ends without a tapestry needle as you knit! | withwool.com

Wrap the tails around the right needle from top to bottom.

Learn how to weave in ends without a tapestry needle as you knit! | withwool.com

Work the stitch normally with the new yarn. Just the new yarn will be caught in the stitch and the tails will fall to the back. This is exactly what you want.

Learn how to weave in ends without a tapestry needle as you knit! | withwool.com

Work the next stitch with the tails held behind the needle.

Learn how to weave in ends without a tapestry needle as you knit! | withwool.com

Repeat steps 4 and 5 until you’re satisfied with how much you’ve woven in. I usually aim for 1 - 2”. Drop the tails, cut the old color, and keep on knitting with nary a tapestry needle in sight.

See how all the steps come together below.

Learn how to weave in ends without a tapestry needle as you knit! | withwool.com

Here’s what the woven in ends look like on the wrong side of the knitting. The tails follow the curve of the chevron with no problem and are quite secure. A quick note: I waited to cut the tails until after the blanket came out of the washer and dryer.

Tips  & Tricks

Learn how to weave in ends without a tapestry needle as you knit! | withwool.com

t the switch between the grey and the blue, the blue yarn isn’t evenly woven in. Since the tails are just wrapped in the working yarn, there’s no need to redo it. Just tug on the tail until it’s neatly in place.

Learn how to weave in ends without a tapestry needle as you knit! | withwool.com

What if the tails were woven in too tightly? As shown above on the left, the stripes will pull in and pucker at the change but it’s easy to fix. Gently pull the edge out until to loosen up the tails and straighten the edge like in the right photo. If the tails get pulled out to far, just tug them back into place.


5 Ways To Use Stitch Markers

Stitch markers come in lots of shapes, sizes, and materials. They can be flexible rubber rings, simple metal triangles, intricate jeweled baubles, or cute beads on wire. You can even make them on the spot from small pieces of leftover yarn, paper clips, rubber bands, or hair ties. Stitch markers can be one continuous piece or able to be opened up and “locked” on a specific stitch. These little tools can do a lot to help with your knitting even if they are easy to lose between couch cushions.

Use them to mark the Right Side of your work. When you first cast-on for a garter stitch project, it can be hard to tell the Right Side from the Wrong Side when you pick it up after a break. Take a stitch marker, different from the rest if you’re using a lot of them, and put it a stitch or two in from the starting edge of the Right Side. Pick up your needles and don’t see the marker near the tip? Then you’re on the Wrong Side of your work. 

Stitch markers can be used to mark more than just stitch repeats. On the Cuddly Chevron Blanket, I placed a marker every time I had to increase or decrease. It kept me from having to count (or miscount) every stitch and left my mind free to listen to podcasts or watch a movie while I knit. 

Clover-Locking-Stitch-Markers.jpg

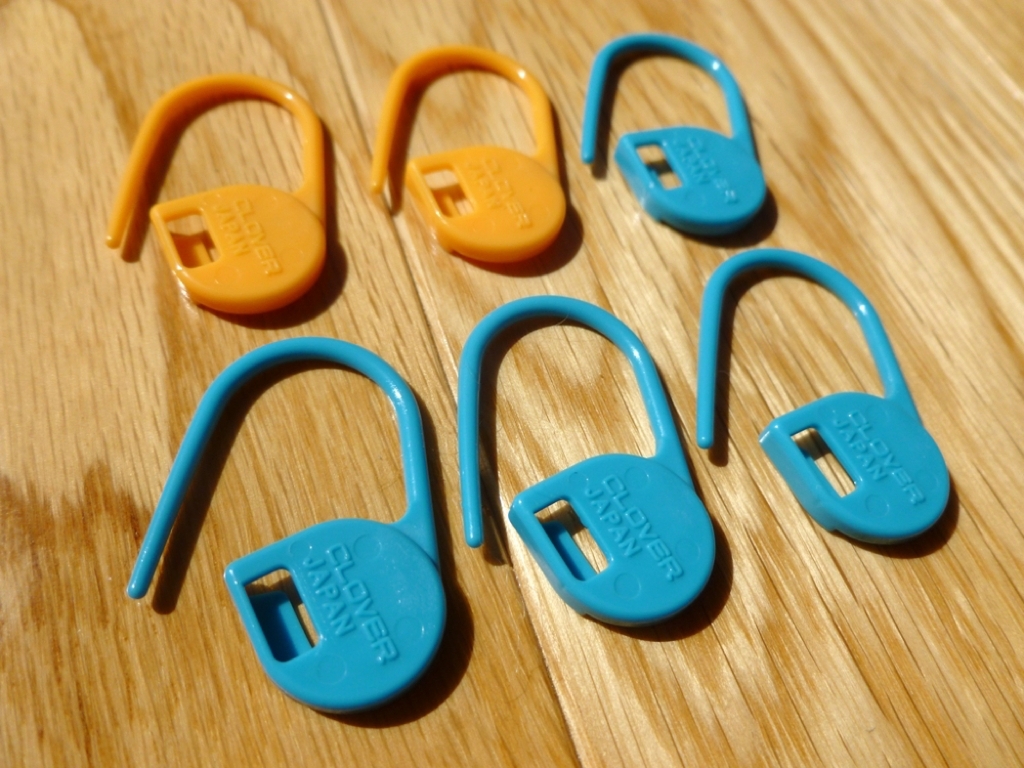
Lockable stitch markers are great for tracking your progress. When you’re working on a big project and it starts to feel like a slog, start your knitting for the day by putting a locking stitch marker on a just knit stitch. When you’re done, you’ll easily see how much you’ve accomplished. This trick is great for seeing progress on sleeves, sweaters, and socks, but can be a bit discouraging if you’re knitting a blanket from the center out.  

stitch-marker-tips.jpg

Stitch markers are also great for counting rows. Here’s also where locking stitch markers come in handy again. When you’re starting a new section of knitting and need to knit a certain number of rows/rounds, say for the ribbing on a pair of toe-up socks, put a locking stitch marker on the first row and count from there. You could also put a marker every 5 or 10 rows so you can see how many rows you’ve knit at a glance. 

Stitch markers are really helpful when you’re casting on a large number of stitches. I can count 20 stitches without losing my place much easier than I can count 400. So, after you cast on 20 sts, place a marker and repeat until you have the required number for your pattern. No miscounting here.

P.S. Here’s one last tip for all the hand spinners out there. Locking stitch markers make it much easier to measure the yardage of skeined handspun. 


Cuddly Chevron Baby Blanket Tutorials

1. Tips for Using Stitch Markers

2. Working lifted increases in garter stitch (January 27th)

3. Weaving in ends as you go without a tapestry needle (February 3rd)

Wander the Web 31

I see a pair of tall, fiery-orange socks in my future. 

I see a pair of tall, fiery-orange socks in my future. 

A collection of fun and interesting links from the week. 


A nursing home floor becomes one giant touchscreen

Adaptable Knitted Survival Clothing

Sipho Mabona folds a life-size elephant from a single 50x50” sheet of paper

How to Measure the Yardage and Width of Handspun Yarn

Herb Williams’ Crayon Sculptures. The tree trunk is my favorite. 

The Default Techniques of Knitting by Ysolda Teague

Wander the Web 28

Sunset-at-Will-Rogers-State-Park.jpg

A collection of fun and interesting links from the week.

Knitted wall art and a great use for leftover yarn. 

OpenKnit - an open source knitting machine

Crazy Stripes! It’s amazing what a few increases and decreases can do.

The Shop Talk Series by Anna Hrachovec, the creative force behind Mochimochi Land. She’s written about how she got started designing patterns, self-publishing, burn out, writing books, online marketing, and tech editing. Definitely worth a read. 

The Frilled Standard Bind Off. If you knit a lot of lace and need a stretchy decorative bind-off, this might be the method for you. 

Wander the Web 27

Bird-Walking-The-Beach.jpg

A collection of fun and interesting links from the week.

I took the plunge and joined Instagram this week. Check out my profile. So far spinning and dinosaurs are the dominant theme. 

I’ll be keeping these tips for knitting a better button band when I knit my next sweater.

Roadsworth paints the town. 

Lemon Ginger Salmon Patties

How to knit the Picot Cast On

How to Draw Hearts with Circles: A Geometric Love Story by Justina Yang

Li Hongbo’s Flexible Sculptures. Cool and just a little creepy. 

Wander the Web 23

Gwen-Erin-Falkland-Fiber.jpg

This weekend I’m spinning a 3-ply yarn just because I finally have enough bobbins to do so. Can’t wait to ply it all together and try out my brand new bulky flyer. The lucky fiber is Falkland from Gwen Erin Fibers with the completely appropriate name of Goldfinch. 

Also, I’m making cookies; Chewy Peanut Butter Chocolate Chip Cookies, to be exact. Shaping up to be a nice few days. 

Knitter’s Graph Paper Journal 

Toon Bombing - Googly eyes can bring any inanimate object bring to life. Mustaches help too. 

Optimist by Hottea - Minimalist yarn bombing at it’s finest. 

How To Make Twisted Fringe 

Office Supplies as Knitting Supplies

Selçuk Yılmaz’s Hammered Metal Lion

Wander the Web 22

Gwen-Erin-Fiber.jpg

Back home from the holidays and settling into the familiar routine along with a few changes for the better. One thing that hasn’t changed is my lovely fiber stash and I’m looking forward to spinning my first yarn of 2014. The Sidekick is clean, oiled, and ready to go. Let the weekend begin!

Sometimes you just need a cat gif. Then another one and another one…

Incidental Comics: Resolution

Kris Temmerman turned his front window into an arcade game.

365 Grateful

Tips for New and Experienced Knitters

Miniature Edible Scenes by Pierre Javelle and Akiko Ida. So fun and cute, the photos make me hungry. 

Breaking the Rules: A Guide to Successful Yarn Substitution 

Tips for Christmas Knitting

BlueRide-Kaleidoscope_WarEagle1.jpg

 I hate to break the news but it’s September and summer is unofficially over. Now for the worse news. There are only 112 days until Christmas, 108 days until Winter Solstice, and a scant 86 days till Hanukkah. Please don’t hurt me, I’m only the messenger. 

I come bearing a few tips to make knitting and crafting through the coming months a little easier. The holiday season is filled with enough stress and knitting should help reduce instead of add to it.

  • Plan your projects. Write a list of everyone you want to knit or craft for and what you’ll be making for them. Planning this stuff out now, will spare you the hassle of figuring it out later. The list doesn’t have to be finished in one sitting. You can add or subtract from it as you go. Just don’t add too much later.  
  • Make a schedule. Set some realistic goals and build your stockpile of awesome knitted gift goodness over the coming months. Start the big stuff now to get it out of the way and give yourself an extra boost when you finish. Leave the small potato chip knitting that you can’t put down for when you feel like doing anything but knitting.
  • Gather your supplies. Need yarn, needles, or random notions? Buy it or find it and put everything in one place. When you’re ready to start a new project or finish one, you’ll have everything you need. There are better things to do at midnight than rummaging around for a tapestry needle. Like sleeping or watching Doctor Who marathons. 
  • Start now. You don’t have to cast on right this minute but start thinking and planning your projects when you still have the breathing room.  

I’ve only just started my holiday knitting/crafting list and winding the first skein of yarn. It’s a pretty short list and will probably stay that way. Anyone have grand plans or ideas for the next few months?

BlueRide-Kaleidoscope_WarEagle2.jpg

Wander the Web 4: Link Love Edition

Trying something a little different and joining up with CraftyPod for Link Love for the remainder of August. Instead of random goodness from across the web, I’ll be sharing some of my favorite tutorials. No crafty goodness or Pinterest board of mine is off limits. This week, I’m sharing five of my favorite tutorials from across the web. 

Transparent Bookmarks from Two Bee - A cute, little tutorial for making transparent bookmarks with a sheet of overhead. The tutorial is in Portuguese but the photos are self-explanatory.

Invisibly Seam Stockinette from Anonyknits - An oldie but a goodie from 2006. Invisibly seam two knit edges together without fooling around with any pesky, live stitches. Tapestry needle and yarn to the rescue.

Delicious Salt Scrub Recipe from Deliciously Organized - Salt scrubs are amazing for your skin and so easy to make. This recipe only calls for a handful of ingredients.

8-Bit Popup Cards from Minieco - How to cut your own pop-up cards. A great minimal design using Space Invaders and skulls but you can use the tutorial to cut any design you please. All you need is colorful paper, a craft knife, metal ruler, and a cutting matt.

Home Made Gift Boxes from Creative in Chicago - I’ve lost track of how many times I’ve used this tutorial for simple, origami gift boxes folded from scrapbook paper. Customize the box to match your gift or any holiday you can find the paper for.

To join in on the fun, check out CraftyPod for all the details.