Fun With Tie-Dyed Yarn

I could only pass by the cotton yarn I tie-dyed (you can read all about that multi-step process here) for so long, before I couldn’t resist winding it up into a ball any longer. There had been plenty of time for me to pick out a pattern or two while I waited on this yarn to dry. Over the many years that I’ve been knitting washcloths and kitchen towels, I’ve definitely figured out what I like. Washcloths can be most any shape, lacey, or textured so long as they are just the right size. That sweet spot is about 7” (about 18cm) square. Kitchen towels I like long and narrow (around 8-9” [20-23cm]wide) so I can easily throw them over my shoulder or hang over the oven door handle. Even better if garter stitch is involved. Sounds boring to make, but hear me out. Garter stitch doesn’t curl, makes a thick fabric, and won’t have any annoying gaps in it (assuming you knit it at a tight-ish gauge). Plus, there’s so many ways to make a garter stitch kitchen towel look cool. It doesn’t have to be knit stitch across every row. Try mosaic knitting, entrelac, a log cabin motif, stripes, chevrons, or knitting on the bias. Throw solid and variegated yarns into the mix, and you’ve got a lot of possibilities to make a really great, functional kitchen towel. Didn’t expect to find my soap box just then, but there you go.

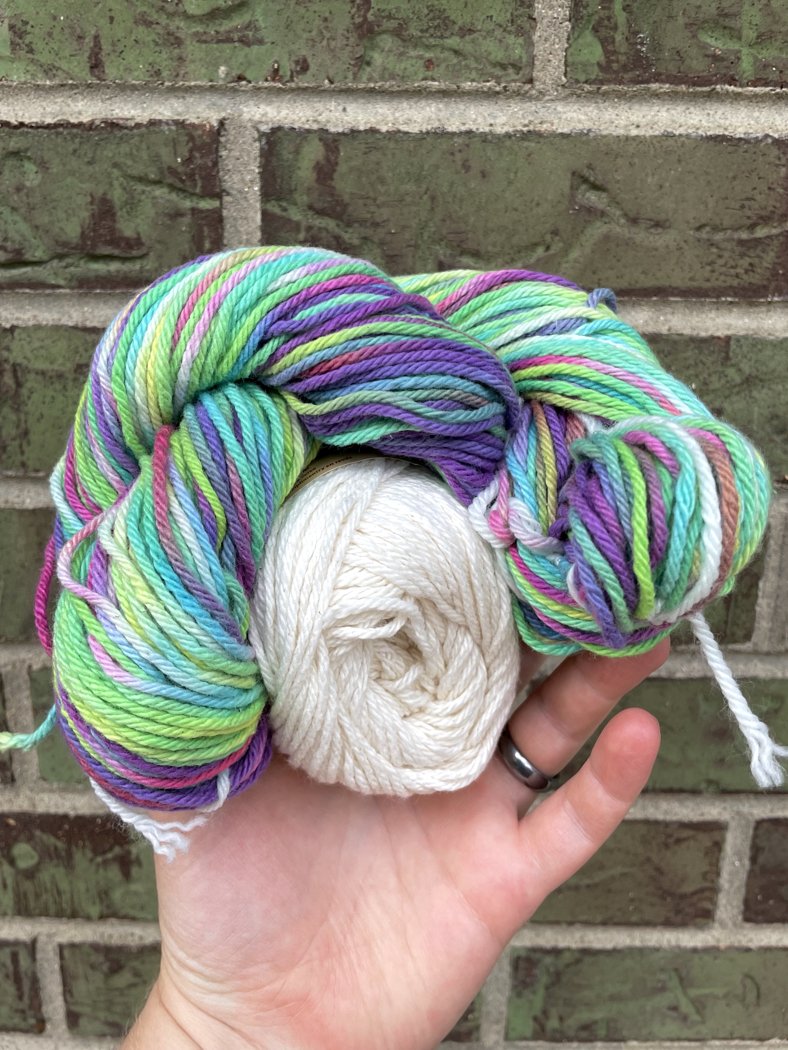
A hand holding up a skein of tie-dyed yarn and a ball of ecru cotton yarn.

My plan for this particular skein was to knit the Slip Stitch Dishcloth with this Lisa Frank-inspired skein and the ecru yarn. I’d get to see all the awesome colors, knit something fun from my queue, and use up some stash yarn. That’s all good stuff in my book.

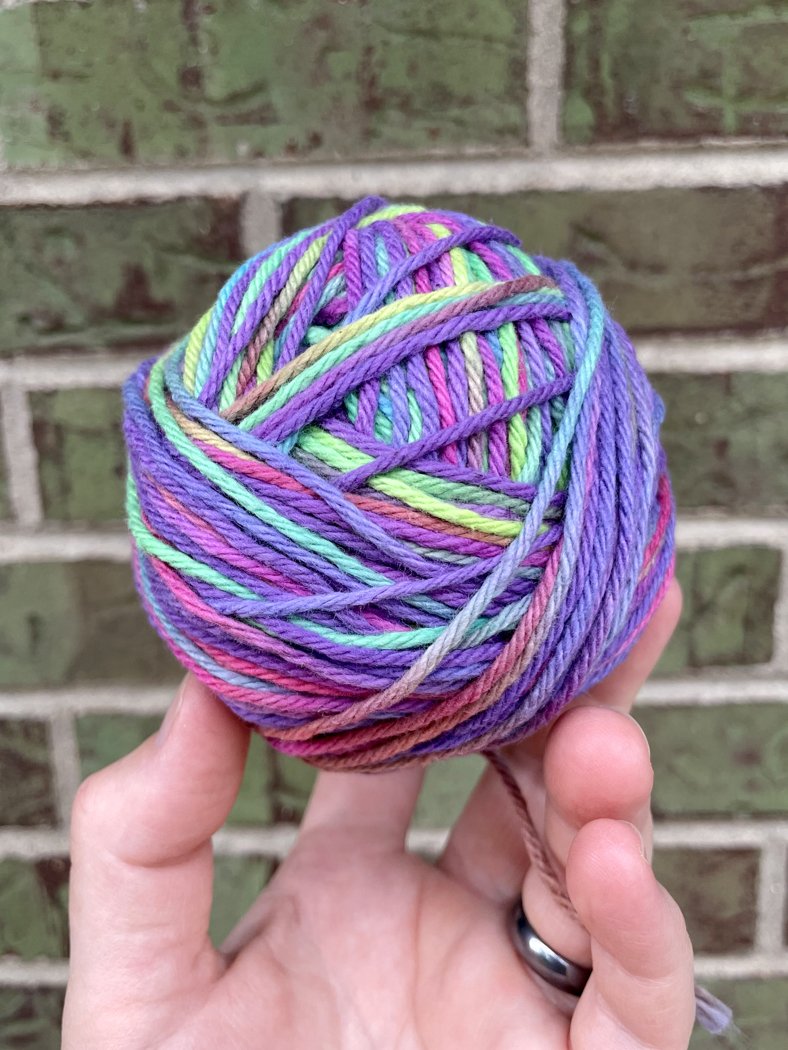
The skein of tie-dyed yarn wound into an equally pretty ball.

I wound the yarn by hand, a rarity for me, and am super happy I did. Even the ball is pretty, which made me even more excited to knit with it.

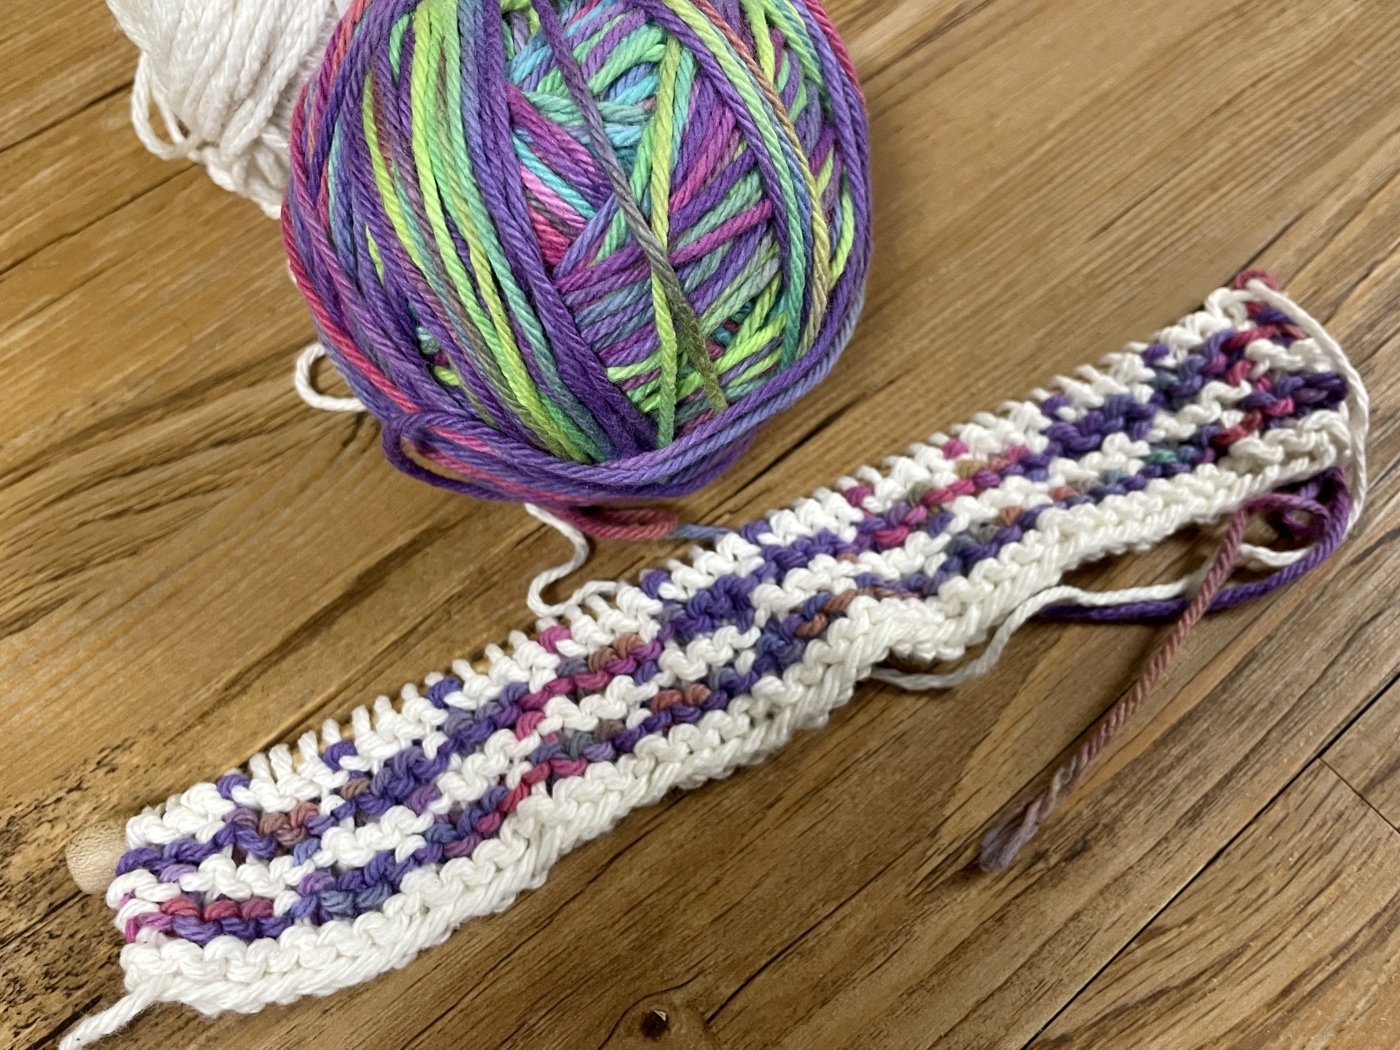
The first repeat of the Slip Stitch Dishcloth on the needle and sitting next to the balls of yarn.

So I cast on for the kitchen towel and knit the first repeat. And…meh. I usually like pairing a solid color with an over the top variegated yarn, but this just didn’t work. Knitting another repeat seemed like a waste of time which meant it was time to rip out the whole thing. Not even a little sad about it because I had another pattern in mind, The Garterlac Dishcloth(here’s a not Ravelry link). This will be the third time I’ve knit this pattern, and it’s great for showing off variegated yarn. Cast on when I had time to parse the directions and my previous mods. This time around, I’m completely smitten. The yarn gets to shine and I get to knit something really fun.

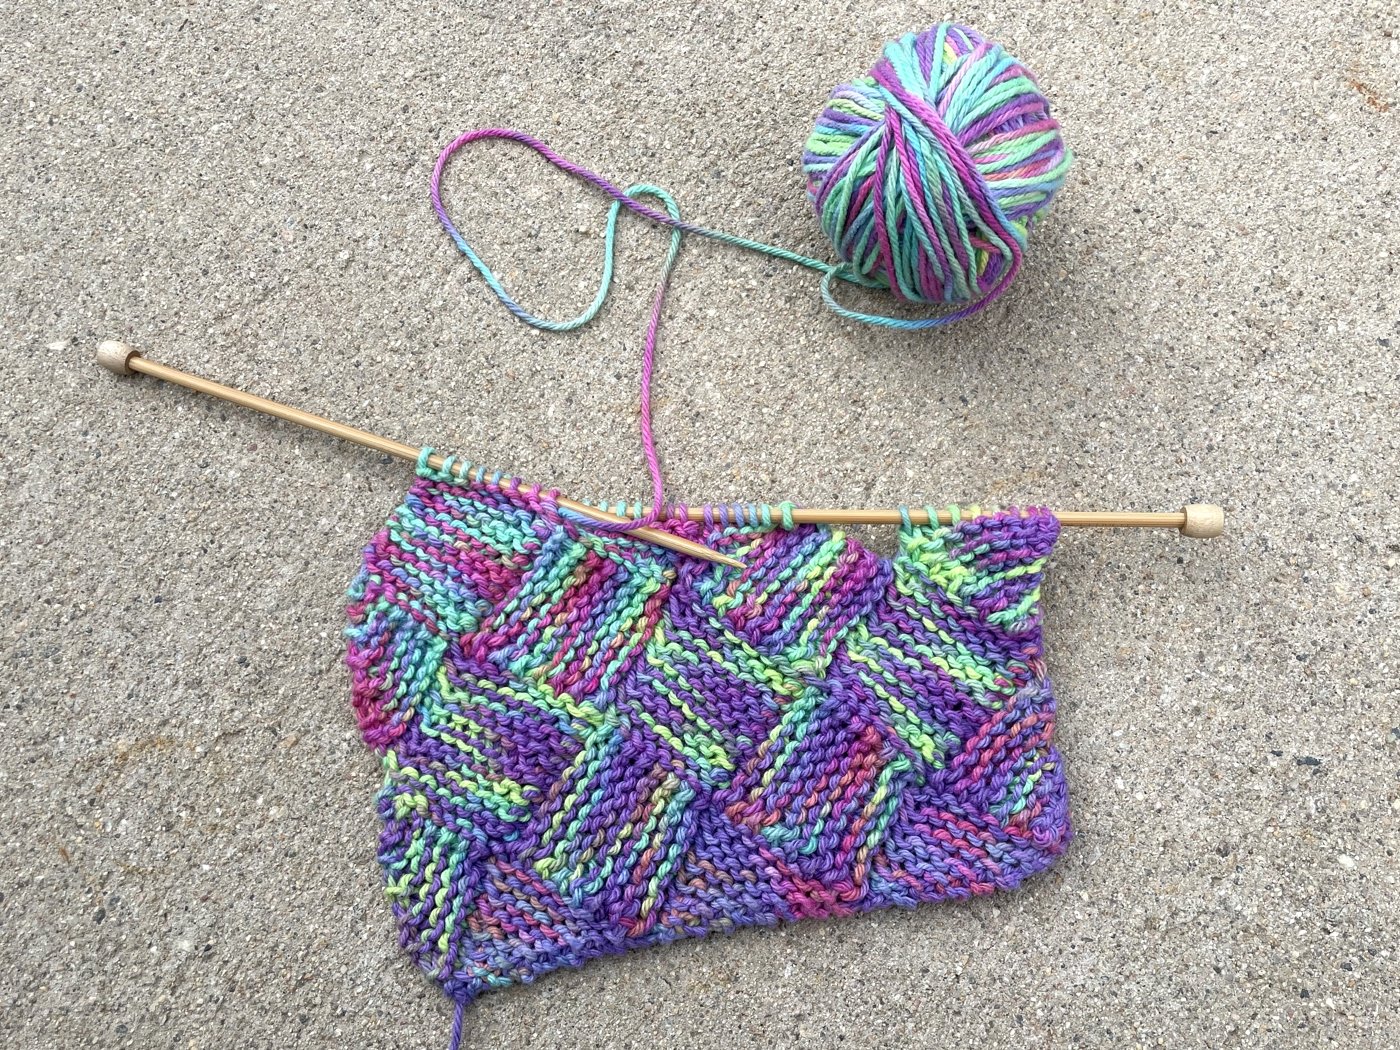
The first few repeats of the Garterlac Dishcloth on the knitting needles.

Just a few repeats in here and you can already see the ombre start with a deep purple and start fading to a more recognizable tie-die aesthetic.

The almost finished Garterlac cloth with a noticeably curving shape.

I was happy to be knitting this (and I finally got the chance to watch The Bob’s Burgers Movie) that I kept on knitting through the weekend. I had a really hard time putting this WIP down. It wasn’t until I was working the top edge that I noticed something was a little off. Okay, way off. I know knitting can look a little wonky until it gets a good wash, but a trip through the washing machine isn’t going to fix this very skewed kitchen towel. That’s when I noticed this:

A close up of the towel with an outline around the messed up area with an extra square.

See this spot with the star? I added an extra square to one of the rows without realizing which threw off every row above it. Ugh. Explains that weird gap that was bothering me too. The Bearded One votes to leave it the way it is, but I just know that I’m going to go “ugh” every time I see it. I can’t not rip it out. Plus, I’m pretty sure I didn’t quite follow the instructions correctly for the first few rows anyway. And that wobbly side edge is bothering me too. This kitchen towel’s fate is sealed. On the upside, I get to knit this pretty yarn again. Can’t be angry about that. Still irritated about ripping it out though.

Adventures In Tie-Dyeing Yarn

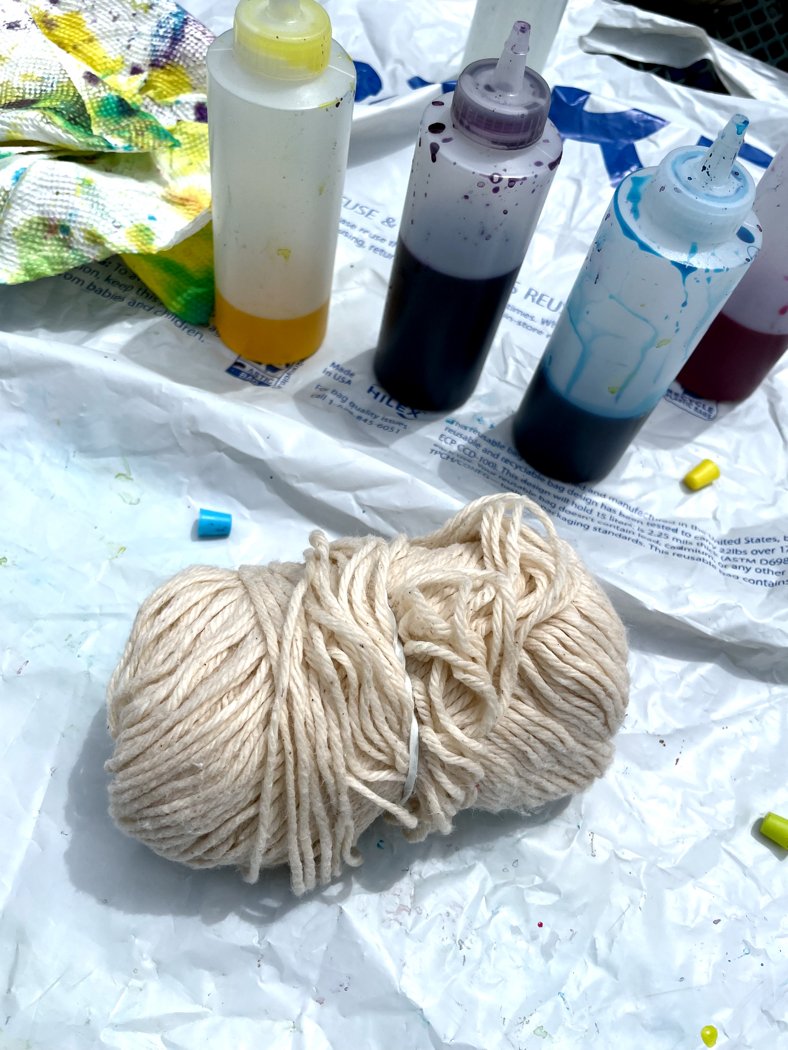
A bare ball of cotton yarn sitting next to bottles of dye on a plastic work surface.

I’ve been slowly scribbling out a Summer Bucket List for the past few weeks. There’s a few of the usual things - making popsicles, going to the pool, having a picnic at the park - and tackling some tie-dye. The kiddo was all in when I suggested the idea, and helped pick out a few things cover in bright neons. There were bags, shirts, a dress, and yarn of course. I dug through the stash and pulled two balls of dishcloth cotton and the last few grams of cotton from a giant cone. Spoiler alert: I could have pulled out an extra ball or two.

I kept the yarn prep pretty minimal. I skeined the yarn from the cone and kept the balls as they were. My only attempt to keep the balls from tangling was to put a rubber band around the middle. Then everything got a soak in some warm water and Eucalan to wash off the leftover oils from the spinning process. That soak probably lasted about 45 minutes because I got distracted. So all the yarn was good and damp when I got to work on it.

Next came the fun part: dyeing! I used a Tulip One Step Tie-Dye Kit in Ultimate. I saved the yarn for last so I could use up any leftover dye.

A skein of cotton yarn dyed with blue, pink, and purple.

I swirled up the skein into a loose spiral before drizzling the dye over the top. Pink in the middle with purple and blue on opposite sides. Coiling it up ended up creating a lot of short sections of color which will look super cool in a washcloth.

A ball of cotton yarn dyed with green, blue, purple, and pink sitting next to a teal paper towel soaked with extra dye.

Another ball of cotton dyed with blue, green, pink, and purple.

The other two balls I drenched in dye. One half of a ball got a big chunk of color while the other half got smaller sections of different colors. I tried to get as much dye as I could in the center of the balls. Probably over did it with one because dye started pouring out when I picked up the ball. At least it was a pretty color. When I was done, each bundle of yarn went into its own bag.

A third ball of cotton dyed with blue, green, and yellow dyes that were several days old.

There was still a little bit of dye left, but I was out of yarn. I made a second trip to the stash a day or two later and prepped one more ball of cotton the same as the others. This ball did not get as thoroughly saturated with dye as the other balls, and I’m really curious to see how it turns out.

Washing the excess dye from the ball in the sink.

After the dye sat for about 24 hours - way more than the recommended 8 - I rinsed out as much of the excess dye as I could under cold water. The water was still running purple, blue, pink, and green after rinsing and and lots of squishing. So they got two baths with Eucualan. The first cold and the second hot.

The first soak with all the dyed yarn turned the cold water purple.

The water in this first cold bath was purple. And the bottom ball of yarn was just barely holding together. The second bath, and the third, were blue. Washing the third ball did exactly the same thing. In all the videos I watched about tie-dyeing yarn, no one mentioned how long or how hard it would be to rinse out the excess dye, especially when working with a yarn cake/ball. The general advice was rinse and skein the yarn to dry. That’s it. So, I had to experiment a bit to find something that worked.

Step 1: Drying the yarn. I so did not want to put a bunch of wet, dye-bleeding yarn on my swift. Thankfully, there was another option. I have a rack for the inside of my dryer that lets me dry stuff flat without tumbling it around. So, the yarn, even balls that were falling apart, went on the rack in the dryer. They didn’t get perfectly dry, but dry enough to not stain my wood swift when I wound them into skeins.

Step 2: Winding skeins. The only bit of yarn I dyed in a skein, was the only bit of yarn that wasn’t constantly bleeding more dye after multiple rinses. So, all the balls of yarn are getting turned into skeins of yarn.

The outer strands (top) and inner strands (bottom) of one of the dyed yarn balls.

This was my first chance to see how the inside of the yarn balls took up the dye! The outer most strands are on top with the inner strands on the bottom. As expected, the yarn from the outside of the ball has a deeper, more saturated color. The inner strands are more pastel, and remind me of a tie-dyed Easter egg. I’m not sure if this difference is because less dye reached the center or because the pre-soak wasn’t able to wash out as much of the spinning oils. Maybe a little of both? This gradient effect occurred across all three of the balls I dyed, no matter how much dye I used.

Step 3: One more rinse with the right soap. When I realized that just rinsing it with my usual soap wasn’t going to cut it, I ordered a bottle of Synthrapol, a special soap that catches any excess dye from yarn/fabric and suspends it in the rinse water.

By the time I got to washing and rinsing the yarn with Synthrapol a week later, I was wondering if I was being a little too cautious. Maybe the regular soap had washed the dye out already. Turns out, the extra steps were totally necessary. This is what the water looked like after soaking the yarn for 40 minutes in hot water.

All dyed yarn in a hot water rinse with Synthrapol. The water turned slightly blue.

This time, the water ran clear during a rinse with cold water.

Step 4: Hang it up to dry. Since I wasn’t worried about the yarn staining everything around it blue and purple, it went on drying rack. I rolled the yarn up in a towel and stomped on it a few times to squish out as much water was possible first, but that was all the special treatment it got this time around.

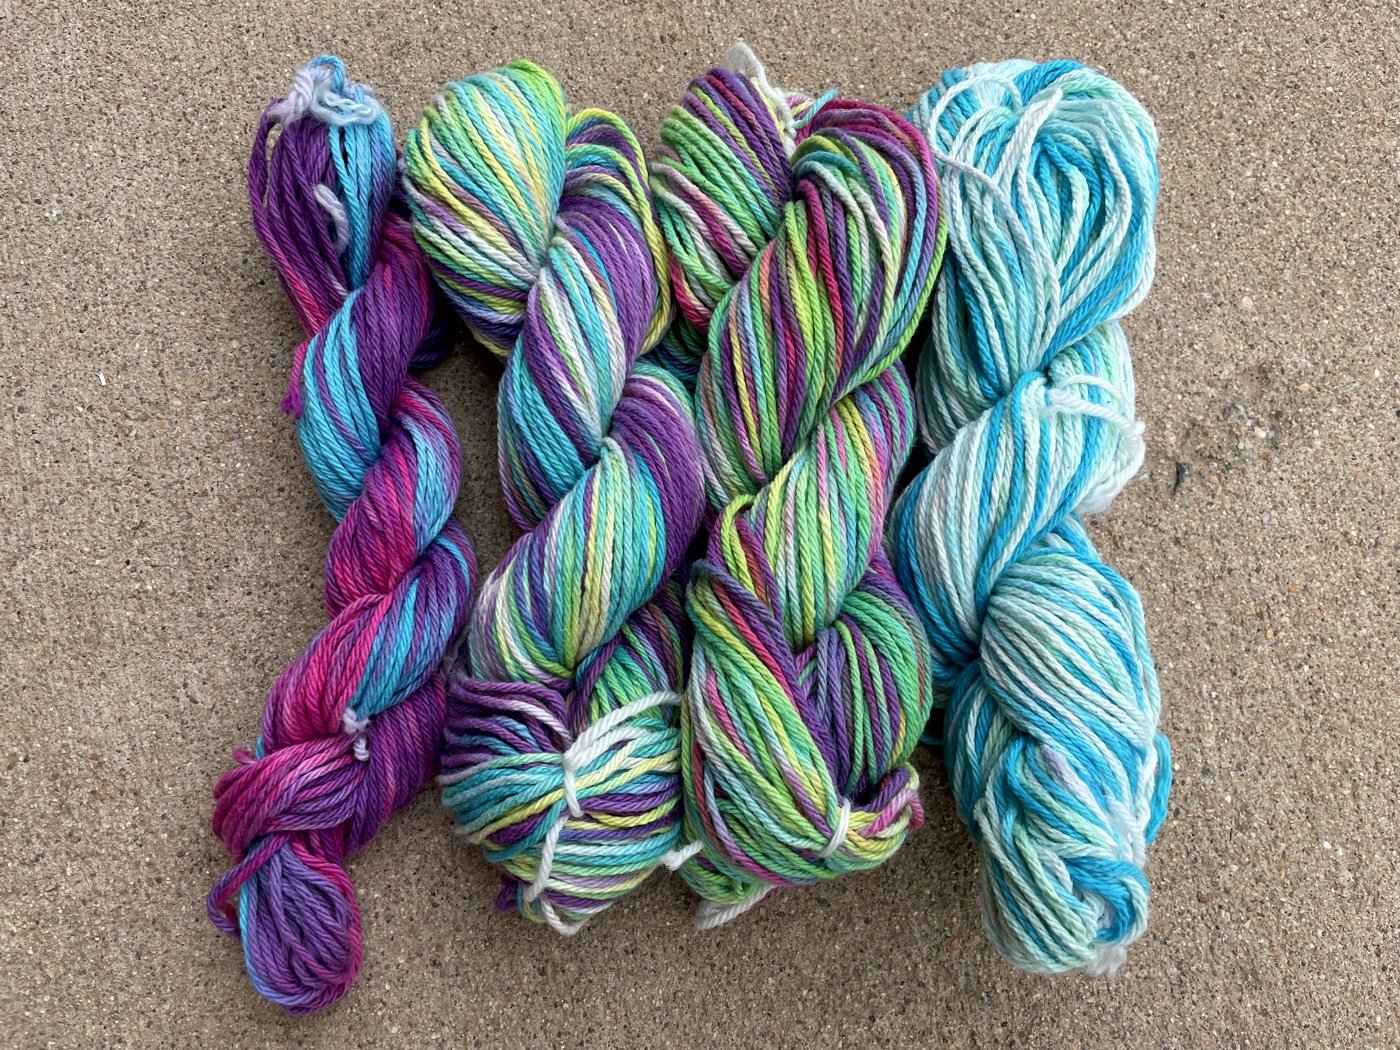
All four dyed yarns washed, dried, and put up in hanks.

The finished yarn looks like it’ll be fun to work with. The colors aren’t as eye-searingly bright and saturated as they looked before washing and rinsing which I’m actually really happy with. The muted (by comparison) tones are much more my jam. I’m also curious to see how well the color holds up after multiple trips through the wash.

Now that there are 4 finished skeins in front of me, would I use a tie-dye kit to dye yarn again? Yeah. I even have a second kit in a darker color palette when I’m ready to give it a go.

Will I dye yarn again in balls? Probably not. The yarn dyed as a skein was way easier to wash and finish than the yarn balls. The skeined yarn also had a more consistent color. I had hoped for a more even color through the whole ball - just with more blank spots in the middle - which was not what happened. The ombré effect is cool, sure, but not enough of a reason for me to go through the extra steps and hassle.

The other thing I would do differently next time is prep more yarn, even if there were a few skeins that didn’t get dyed. The yarn dyed with fresh dye has a deeper color than the yarn I dyed two days later at the end of the dyes’ life span. I’d also wash the yarn with Synthrapol from the first rinse and save a lot of time and water.

Dyeing yarn with a tie-dye kit was a fun experiment. It’s been a long time since I’ve dyed yarn, and it was nice to scratch that itch after so many years. Now I’m excited to knit all this up and make some cool new kitchen towels and washcloths.


This post contains an affiliate link which means, if you decide to buy through that link, I’ll get a small commission. Thanks!

Wander the Web 54

Things are rapidly disappearing into boxes as The Bearded One and I prep to move home base to our new home. My spinning wheel is packed and ready to go but I still need to decide what knitting is going to stay in arm’s reach. See you on the other side when I have internet again. 

Inspiring, fun, thought-provoking, and crafty links to round out the week and jumpstart your brain.

Sheep to Sweater - I’ve wasted way too much time playing this game. It’s awesome. 

Frozen Almond Chai

Weaving on a metal rack - Fun idea!

How to Tie-Die Tissue Paper - Looks like an easy project but creates an amazing result. I wonder how this would work with fabric.

Urban Farming Classroom by Colorado Building Workshop

Simple Yarn Garland - A cute idea fro what to do with all those little leftover bits of yarn. 

What A Soldier Carries - Bristith military kit from the Battle of Hastings to Helmand.

Wander the Web 50

Inspiring, fun, thought-provoking, and crafty links to round out the week and jumpstart your brain.

A couple of days ago, I found a box sitting outside my steps. Inside were lots of Happy Birthday! goodies and a comfy pair of hand knit socks. I’ve wanted to knit Hermione’s Everyday Socks for years and Cece beat me to it. Thanks, Cece! They’re awesome socks.

A great primer on different wools and fibers aimed at spinning the perfect sock yarn. 

Make something small every day.

“Great people do things before they’re ready.”

Lucy Sparrow hand stitched 4,000 items -beer, magazines, candy bars, what have you - to stock a corner store.

DIY Natural Dyes Chart - focused on fabric but would probably work for yarn too

Wander the Web 18

Santa-Monica-Sunset.jpg

I’d forgotten how wonderful it is stand on the beach and watch the sun set over the Pacific Ocean. 

DyeYourYarn.com

DIY Button and Crochet Necklace - I really want to blow up the scale and make an extra long garland. 

Take-Out Fake-Out: Chicken Lo Mein

Cranberry Orange Breakfast Buns - Can never have too many recipes for early morning sweets. 

Five Ways to Find Inspiration Offline - I’m really fond of getting out of my own four walls and going for a long walk. 

Kelpies, Giant Horse Head Sculptures in Scotland

The Knitting Collection of Loes Veenstraand 

Hypnotic Kinetic Sculptures by Anthony Howe - "What matters is putting human feeling into your design."

How to Wash Excess Dye Out of Yarn

...or, I’m really tired of my hands turning blue.

A few months ago, I was spinning some bright blue roving into yarn. The roving, besides from being easy to draft, was pretty and soft but turned my hands and spindle blue. Drafting the singles, blue hands. Plying the singles, blue hands. Skeining the yarn, oh look, blue hands. Thankfully, a bath to set the twist was a perfect time to get rid of all that extra dye. But first, research. To the internet!

SpinningPencilRoving5.jpg

My first thought was to try a vinegar bath since I’ve repeatedly heard that adding a little vinegar to the water will set the dye. Numerous blog posts and message boards later, I came to the conclusion that just soaking the yarn in vinegar wouldn’t do a thing. There also has to be heat for the vinegar to do it’s job since the vinegar acts as mordant which lets the dye set on the fiber. I wasn’t willing to cook my yarn which meant the only way to fix the blue problem was to wash the dye away. 

If, like me, you don’t put your yarn on the stove, you’ll need a sink, cool water, and good soap to wash the dye away. Wool wash is the best choice but dish detergent works too. I used a combination of Dawn Ultra and Eucalan.  

Washing-Excess-Dye-From-Yarn.jpg
1: Fill the sink with enough cool water to let the yarn soak and float. Add soap after the sink is full to prevent suds that you’ll just have to rinse away later.

2: Dunk the yarn in the water. Let it soak for a few minutes and gently swish it around. If the water dramatically changed color, immediately skip to step 3.

During the yarn’s first dunk, the bath turned so blue that I couldn’t see the bottom of the sink through 4” of water.


Washing-Yarn-Dye-Bath.jpg

3: Drain the water and rinse the yarn with as little agitation as possible. Repeat as necessary. 

I had to put my yarn through 5 separate baths and it was still dripping blue water when I hung it up to dry.

Felted-Handspun.jpg

Pro Tip: Even if you’re using a soap that doesn’t need to be rinsed, agitate the yarn as little as possible. Wool and other animal fibers can still felt in cool water. All the rinsing and agitation can add up over multiple baths. If the yarn does start to felt but you catch it soon enough, the yarn will still be salvageable and knit-able. 

I accidentally felted my blue handspun but stopped washing the yarn when I noticed the felting. I hung it up even though it was still dripping blue water. When it was dry, I had to pull the skein apart one strand at a time. I lost some yardage to shrinkage but I didn’t have to cut anything. Surprisingly, I like the yarn better felted.

Pro Tip #2:

Be aware that the yarn might lose some of it's color during the repeated baths. Mine went from gym short blue to sky blue. 

Blue-Handspun-Yarn.jpg
Felted-Handspun-Spread.jpg

Marble Dyeing

MarbleDyedHandkerchief2A.jpg

The second Saturday of April came and went while I spent the morning at my favorite fiber guild, The Greater Birmingham Fiber Guild. This month we played around with marble dyeing silk handkerchiefs. I’ve never tried marble dyeing before and was looking forward to learning something new. To dye the cloth, we dropped dye on water thickened with methylcel and then swirled the colors before laying the handkerchief on top. The treated water had the consistency and feel of slime so everything floated.

MarbleDyeBath.jpg

The process was pretty fun and there were some great results after a bit of troubleshooting. Sometimes the dye wouldn’t spread and just fell to the bottom of the pan. Sometimes the dye spread too much. Other times the dye wouldn’t stick to the cloth at all. The secret to marble dyeing might be holding your jaw just right. 

MarbleDyedHandkerchief2.jpg

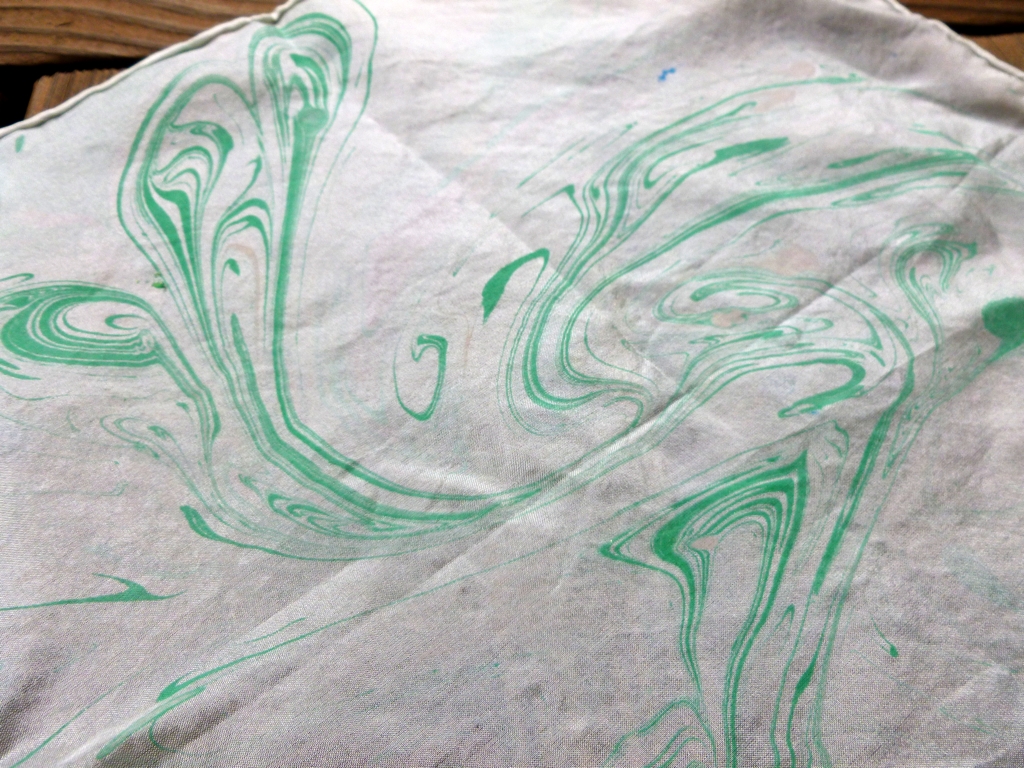
My first attempt came out pretty well even if it doesn’t look like traditional marbling. I’m going with surrealist peacock feather. The second try was only half successful since only one of the colors really shows. Stare at it long enough and you’ll start to see things. I’ve noticed a few faces, an alien, and an epic fish. What do you see?

Now to figure out what to do with two silk handkerchiefs and stare at marbled paper with new found appreciation. 

MarbleDyedHandkerchief.jpg