How To Knit Cables Without A Cable Needle

How To Knit Cables Without A Cable Needle || withwool.com

I love the complexity and depth and texture that cables create. I love small simple cables and big complicated cables. For complicated cables and reversible cables, cable needles are my best friend, but for small cables - 6 stitches or smaller - I skip the cable needle. It makes the knitting faster and and there’s one less thing to fiddle with.

I knit the Old Friend hat without a cable needle which helped make the project a quick, easy knit.

Front Cross Cable

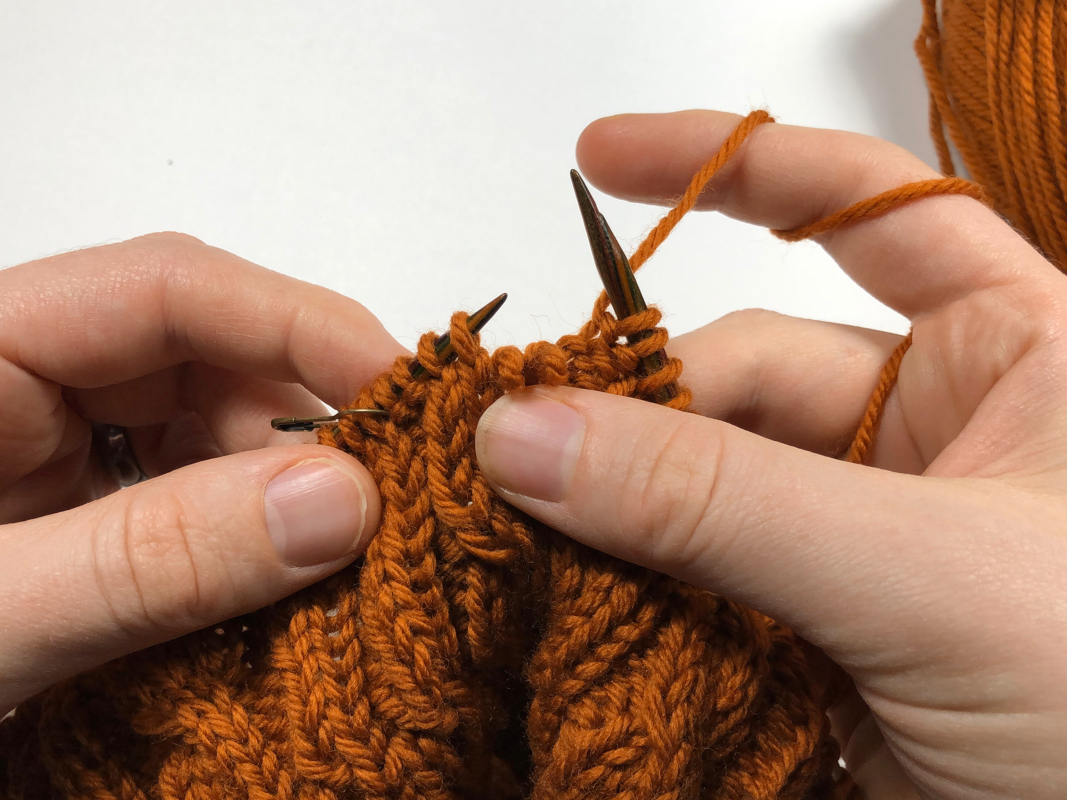
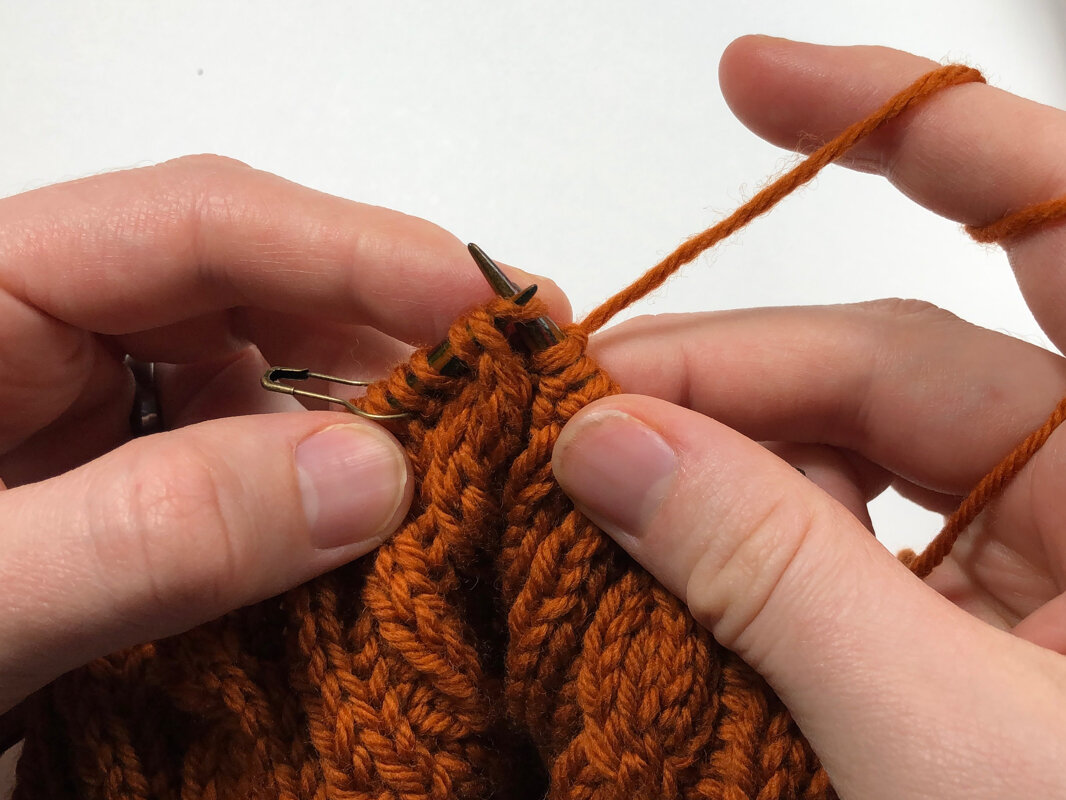
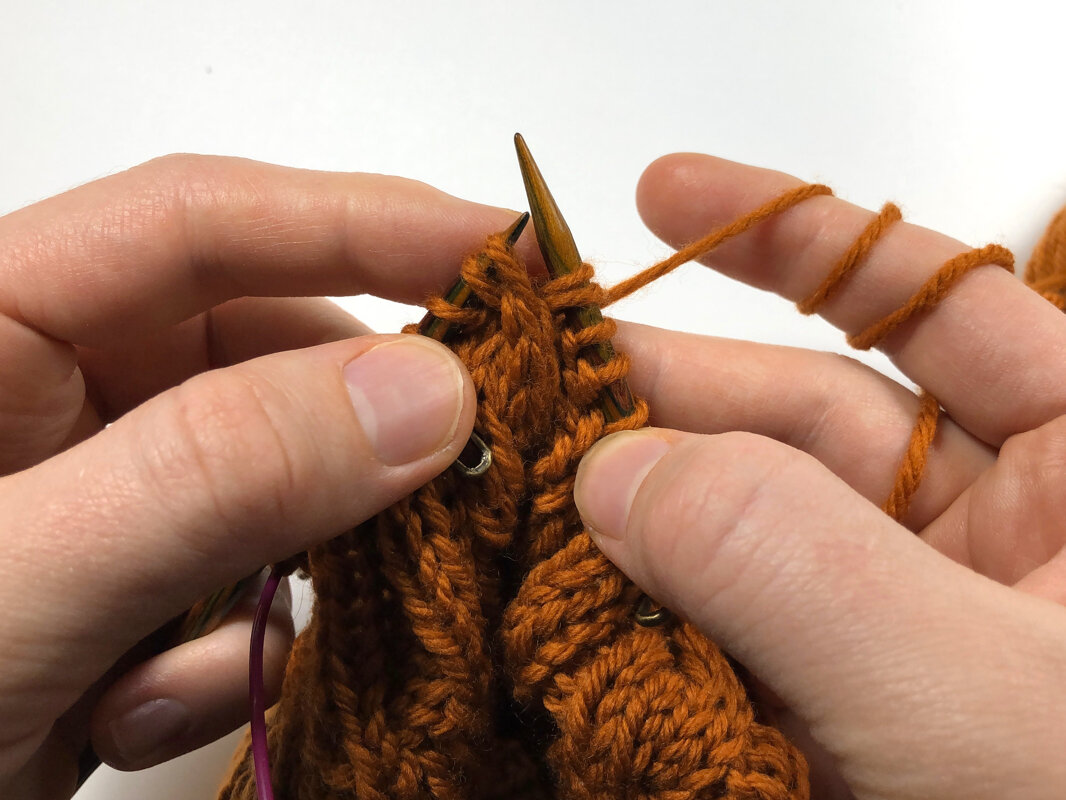
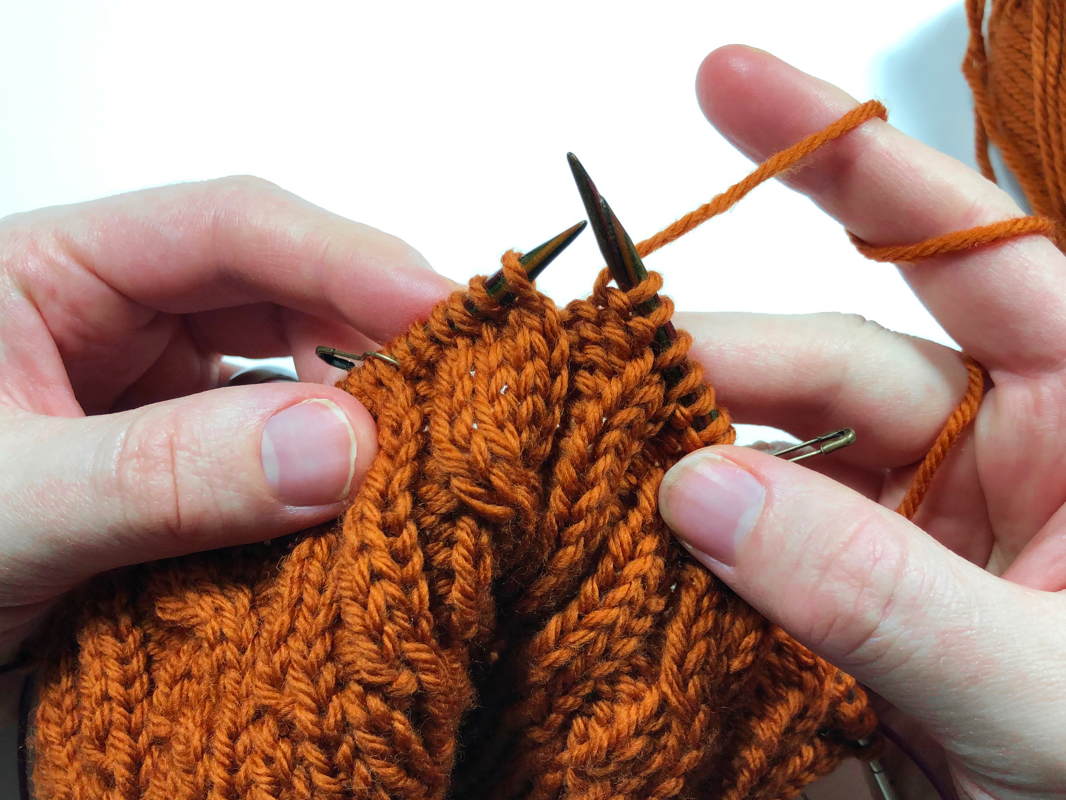
Knitting across a row and ready to cross a 4 stitch cable.How To Knit Cables Without A Cable Needle || withwool.com

In the photo above, I’m ready to work a front crossing cable, also called a left cross cable, across the next 4 stitches on the left needle. This means that the 2 right-most stitches will be crossing in front of the 2 left stitches.

The right 2 stitches hanging of the needles to prepare to cross a front cross cable without a cable needle.How To Knit Cables Without A Cable Needle || withwool.com

The first step is to slip the 2 right (front) stitches closest to the needle tip off the needle.

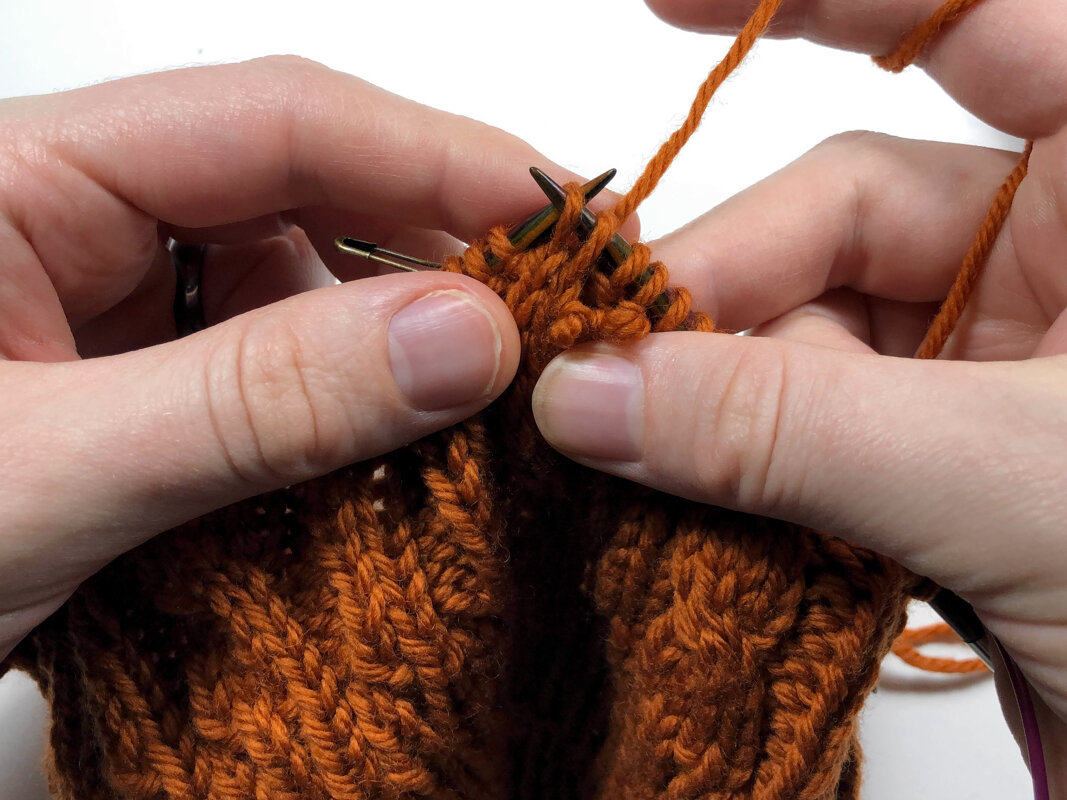
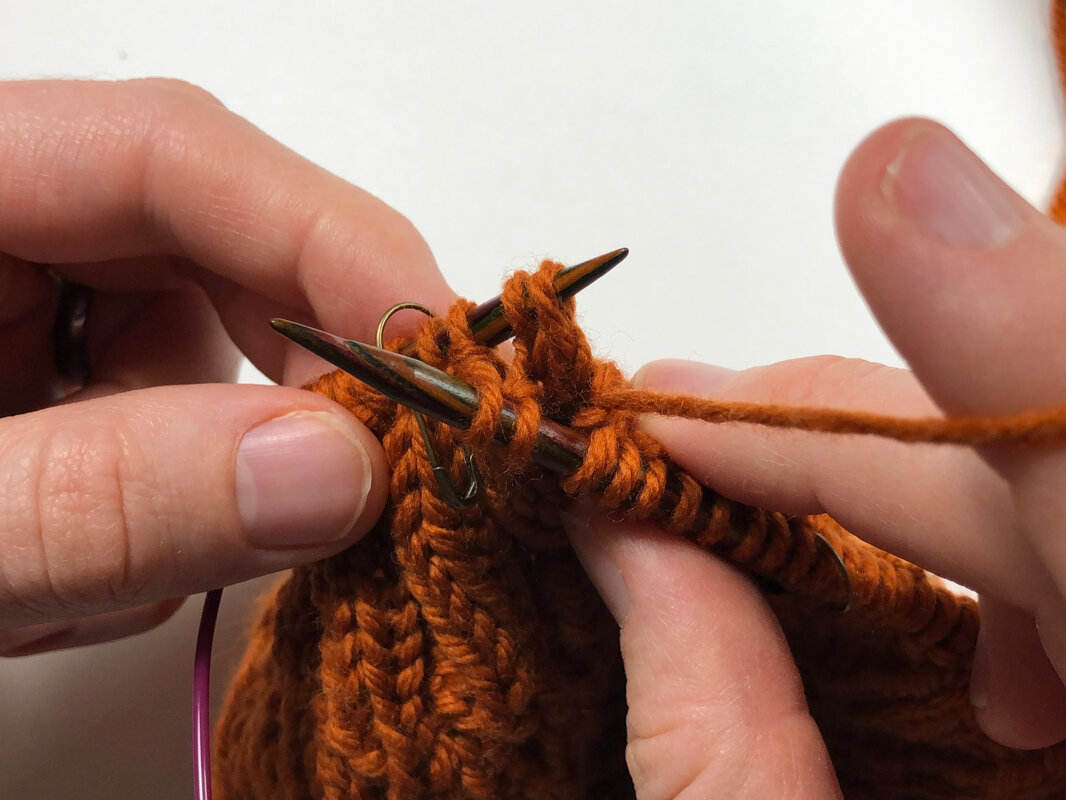
Slipping the left cable stitches onto the right needle to cross the cable. The other half of the cable stitches are hanging in the front of the work.How To Knit Cables Without A Cable Needle || withwool.com

Next slip the 2 left stitches purl-wise from the left needle to the right needle. The hanging stitches will stay in the front and you can hold them in place with your thumb.

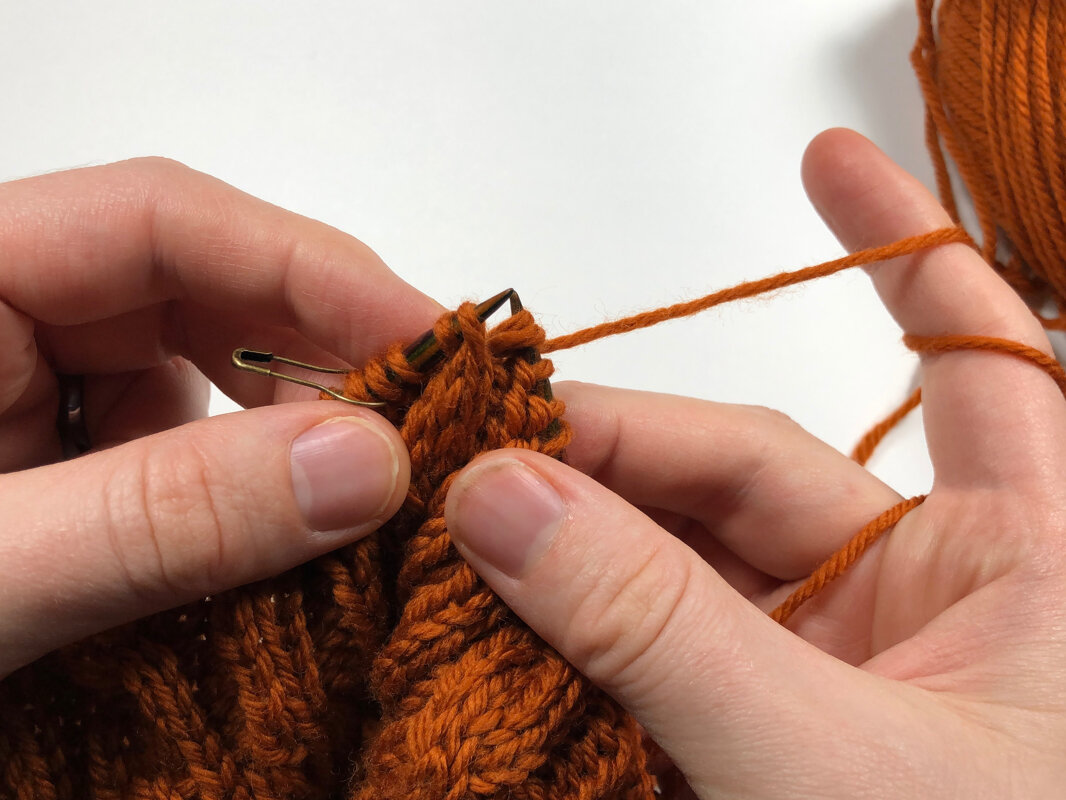
Slipping the hanging cable stitches onto the left needle purl-wise.How To Knit Cables Without A Cable Needle || withwool.com

Slip the hanging stitches on to the left needle purl-wise.

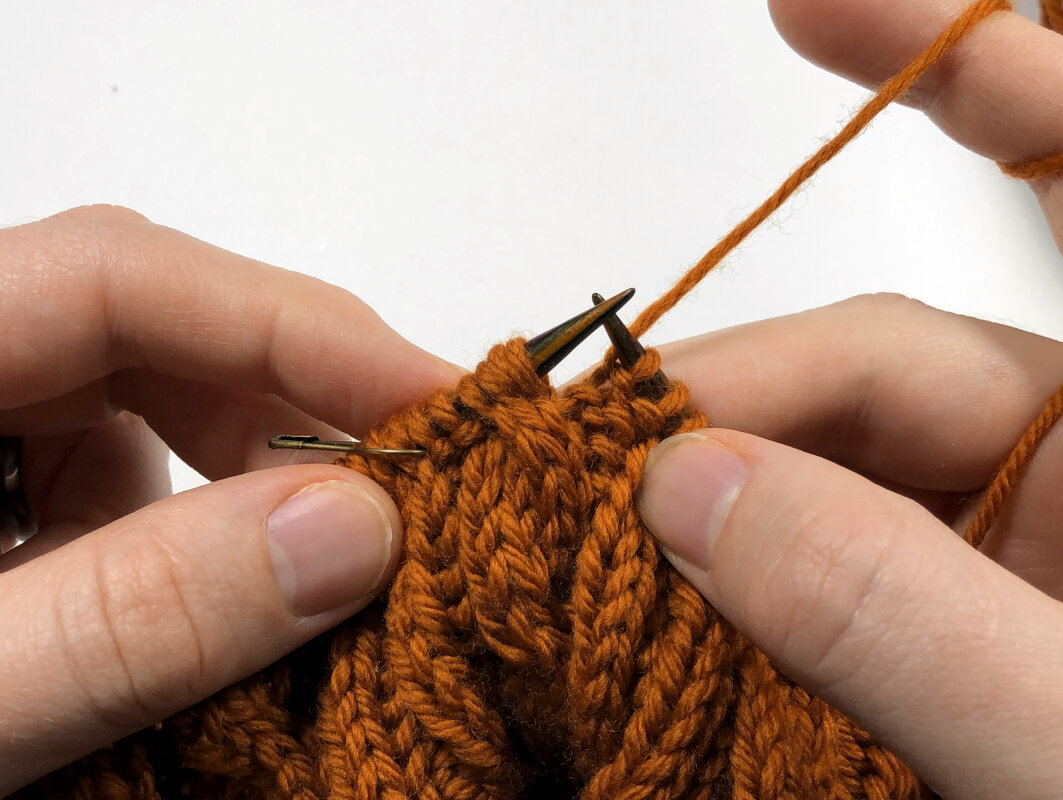
Slipping cable stitches from right needle back to left needle. The cable is crossed and is now ready to be knit across.How To Knit Cables Without A Cable Needle || withwool.com

Slip the 2 cable stitches on the right needle back to the left needle. Now the hard part is done, and the cable is crossed.

Knitting across the cable stitches in pattern.How To Knit Cables Without A Cable Needle || withwool.com

Knit (or purl as the pattern requires) across the cable stitches. You’re ready to keep working across the row.

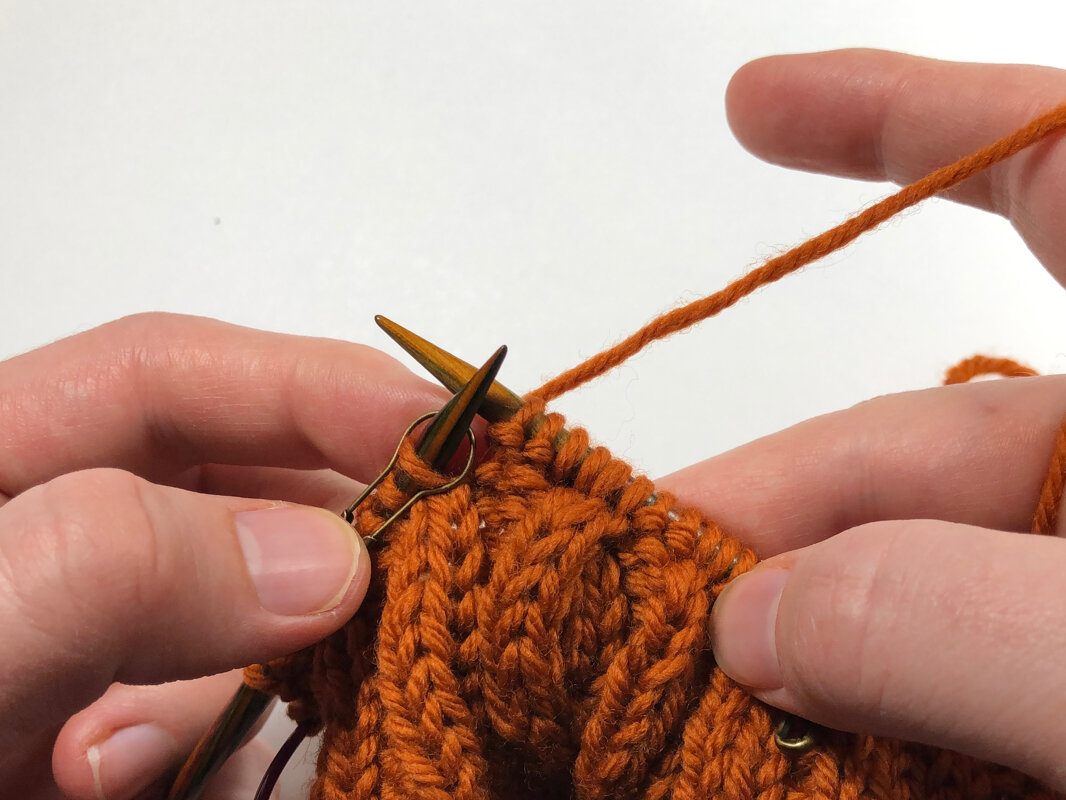
A complete front cross cable.How To Knit Cables Without A Cable Needle || withwool.com

Here’s what the knitting looks like after working the cable cross.

Back Cross Cable

The left stitches of a back cross cable handing off the needles and being held behind the left needle.How To Knit Cables Without A Cable Needle || withwool.com

Now I’m ready to work a back crossing cable, also known as a right cross cable - which means that the 2 right-most stitches will be crossing behind the 2 left stitches. The first step is to slip the 2 right stitches off and hold them behind the needle.

Slipping the left half of the cable stitches to the right needle. The hanging cable stitches are hidden behind the work in the photo.How To Knit Cables Without A Cable Needle || withwool.com

Next slip the 2 left stitches purl-wise from the left needle to the right needle. The hanging stitches will stay in the back which is why you can’t see them in this photo.

Slipping the hanging cable stitches purl-wise onto the left needle.How To Knit Cables Without A Cable Needle || withwool.com

Slip the hanging stitches on to the left needle purl-wise.

A complete back cross cable, also known as a right cross cable.How To Knit Cables Without A Cable Needle || withwool.com

Slip the cable stitches on the right needle back to the left needle and work across. Now you’re ready to keep knitting to your next cable.

Even Faster Cable Knitting

Now that you’ve seen the basics, are you ready to work cables even faster? Here’s a demo with a front crossing cable, but the basic process will be the same for a back crossing cable as well.

Inserting the right needle into the left half of the cable stitches on the back of the work to work a front cross cable.How To Knit Cables Without A Cable Needle || withwool.com

Slip the right needle purl-wise into the left half of the cable stitches from behind.

Cable stitches hanging off the needles at the front of the work after pulling out left needle. Other half of the cable stitches remain on the right needle.How To Knit Cables Without A Cable Needle || withwool.com

Pull the left needle out of the cable stitches. The two left stitches will be on the right needle with the other two stitches hanging out in front.

Left needle slipped into previously hanging cable stitches. Next step is to slip other cable stitches to left needle and work across.How To Knit Cables Without A Cable Needle || withwool.com

Slip the left needle back into the hanging stitches purl-wise and on the front side of the work. Then slip the 2 cable stitches on the right needle back to the left needle. Work across and you’re ready to cross more cables.

If you enjoyed this tutorial, buy me a coffee! Thank you for your support!

Buy Me a Coffee at ko-fi.com

How To Do The Long Tail Cast On And Helpful Tips

The Mosaic Sisters pattern- a set of colorful mosaic knit kitchen towels, washcloths, and coasters - is here! Meet the sisters and get the pattern.

Check out the other tutorials for the Mosaic Sisters: Mosaic Knitting 101 & Stripes And Carrying Yarn Up The Side


The long tail cast on was was one of the first cast ons I learned after branching out from the backwards loop cast on that most new knitters learn right off the bat. After years of knitting, the long tail method has become one of my favorites and my default cast on when a pattern doesn’t ask for a specific method. It’s stretchy, makes a tidy edge, and works up quickly once you get the hang of it. It can be worked in knit, purl, or ribbing (this tutorial focuses on the knit version). 

The long tail cast-on creates the first row of your work - which is why I especially love this cast on when working with non-stretchy yarns like cotton or linen which can be hard to start from a backwards loop cast on. Having a row already made is also great for when you join to knit in the round because it’s much easier to check that the stitches haven’t twisted around the needle. Plus, if you mess up and knit too many rows like I did on a recent project, you can even un-pick the cast on to fix the mistake. The process is a little finicky, but completely doable. 

Even better, for all of this long-tail goodness, all you need are needles and yarn. 

Getting Started

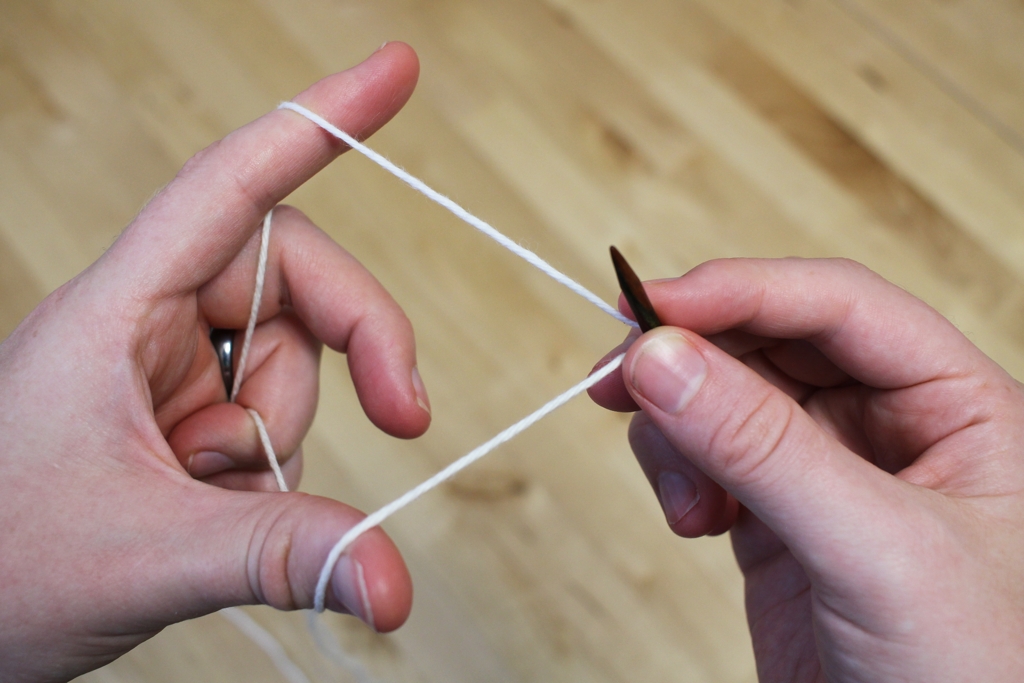
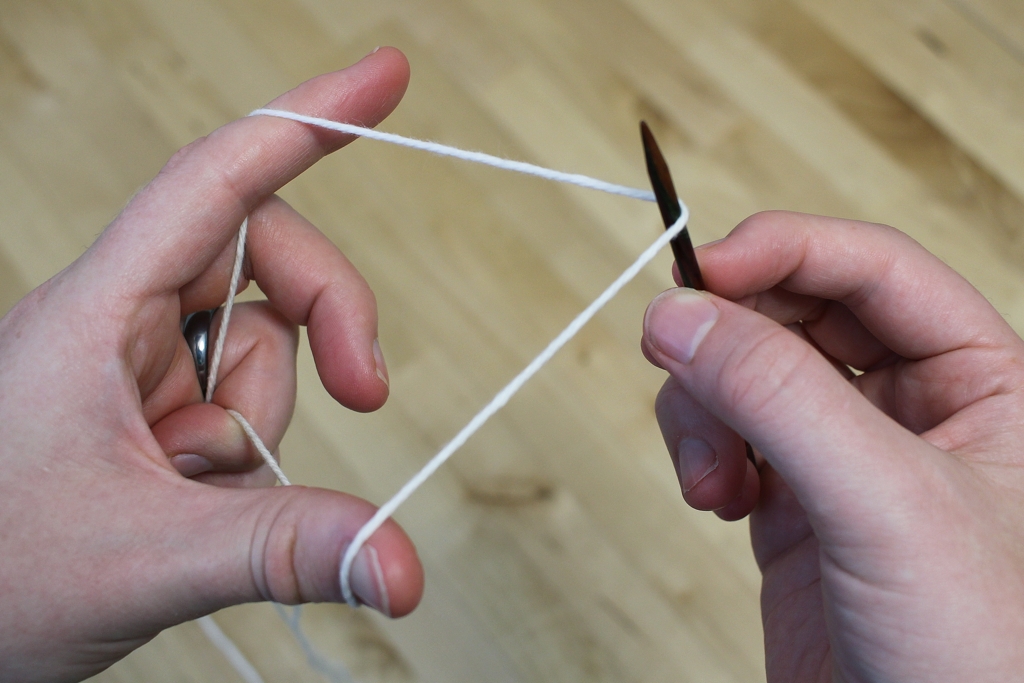
Pull the yarn over the needle with the tail end to the front. There’s no need to tie a knot. The photos above show how to hold and position yarn on the needles with and without my fingers in the way. Hold the yarn in your left hand with the tail end of the yarn over your thumb and the working end over your pointer finger. The needle goes in the middle. The yarn over your thumb becomes the bottom edge and the yarn over your pointer finger becomes the first row.

How much yarn do you need to pull out? Eventually, you’ll be able to eyeball the amount, but a good trick is to cast on 10 stitches, then unravel to find out how much yarn they used. Multiply the amount and had a few inches to weave in later and you’ll have a good estimate. 

Here’s an interesting fact: if you reverse positions and hold the needle in your left hand and the yarn in your right, you’ll make purl stitches instead of knit stitches. 

The 4 Steps To Make A Stitch

How to make a stitch with the long tail cast on. Also, gifs are perfect for when you don't want to watch an entire video.

How to make a stitch with the long tail cast on. Also, gifs are perfect for when you don't want to watch an entire video.

There are 4 distinct steps to make a stitch which seem complicated at first, but your hands will learn. Cast on enough stitches and you won’t even have to think about doing them. I exaggerated the motions to make the steps clearer, but I usually work with much smaller and faster movements.

Step 1: Bring the yarn in front and up underneath the yarn in front of your thumb. This is the loop that will secure the stitch. 

Step 2: Move the needle behind the forward strand on your pointer finger from right to left.

Step 3: Move your thumb backwards which bring the the loop over the needle and the yarn.

Step 4: Take your thumb out of the loop and pull on the front piece of yarn to secure the stitch.

Repeat those 4 steps until you have all the stitches you need on the needles and your first row. If you’re working in stockinette, purl the next row.  

When Casting On Lots of Stitches…

The main complaint about the long-tail cast on is when making a lot of stitches. I’m going to be conservative and say 50 stitches and up. If your yarn estimate is off, you’ll have too little yarn and have to rip out to start again or too much yarn and have a long tail hanging off the end of your work. To avoid both of these hassles, work the cast on with two strands of yarn instead of one.

You don’t have to knot them together either. Just hold the ends in place on the needle with your fingers. Once the first 2 stitches are on the needles, the yarn is secure and isn’t going anywhere. When the cast on is finished cut the front strand of yarn long enough to weave in. Yeah, it’s another end to weave in but it’s still less time and energy than having to repeatedly redo the cast on.

5 Ways To Use Stitch Markers

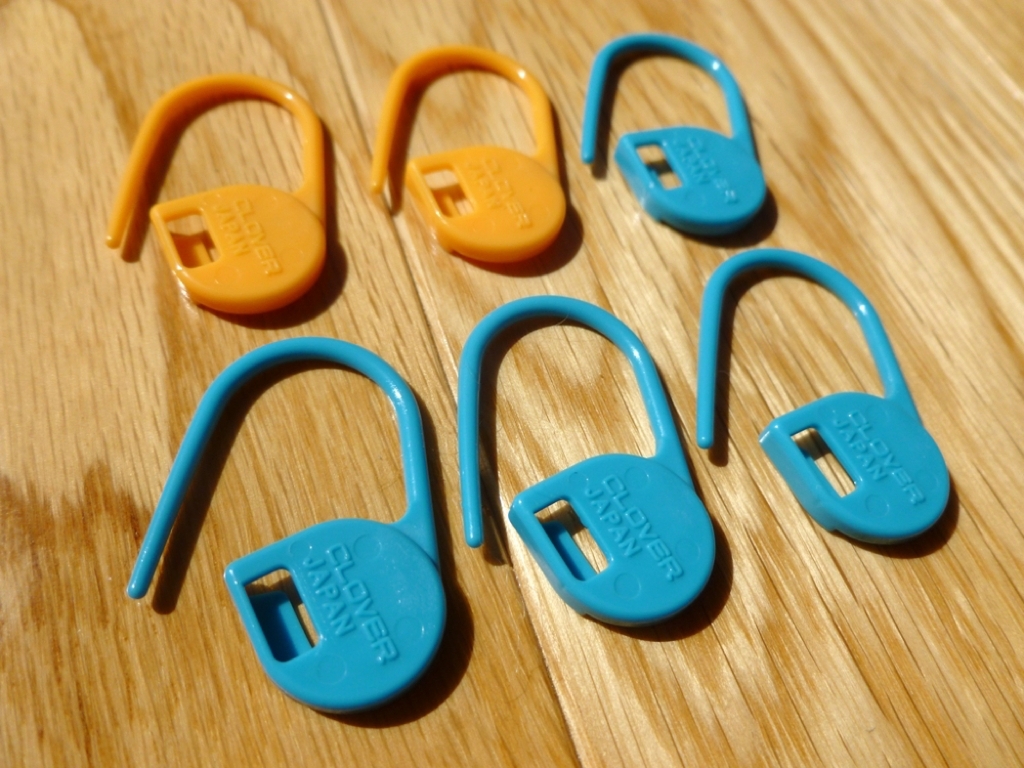
Stitch markers come in lots of shapes, sizes, and materials. They can be flexible rubber rings, simple metal triangles, intricate jeweled baubles, or cute beads on wire. You can even make them on the spot from small pieces of leftover yarn, paper clips, rubber bands, or hair ties. Stitch markers can be one continuous piece or able to be opened up and “locked” on a specific stitch. These little tools can do a lot to help with your knitting even if they are easy to lose between couch cushions.

Use them to mark the Right Side of your work. When you first cast-on for a garter stitch project, it can be hard to tell the Right Side from the Wrong Side when you pick it up after a break. Take a stitch marker, different from the rest if you’re using a lot of them, and put it a stitch or two in from the starting edge of the Right Side. Pick up your needles and don’t see the marker near the tip? Then you’re on the Wrong Side of your work. 

Stitch markers can be used to mark more than just stitch repeats. On the Cuddly Chevron Blanket, I placed a marker every time I had to increase or decrease. It kept me from having to count (or miscount) every stitch and left my mind free to listen to podcasts or watch a movie while I knit. 

Clover-Locking-Stitch-Markers.jpg

Lockable stitch markers are great for tracking your progress. When you’re working on a big project and it starts to feel like a slog, start your knitting for the day by putting a locking stitch marker on a just knit stitch. When you’re done, you’ll easily see how much you’ve accomplished. This trick is great for seeing progress on sleeves, sweaters, and socks, but can be a bit discouraging if you’re knitting a blanket from the center out.  

stitch-marker-tips.jpg

Stitch markers are also great for counting rows. Here’s also where locking stitch markers come in handy again. When you’re starting a new section of knitting and need to knit a certain number of rows/rounds, say for the ribbing on a pair of toe-up socks, put a locking stitch marker on the first row and count from there. You could also put a marker every 5 or 10 rows so you can see how many rows you’ve knit at a glance. 

Stitch markers are really helpful when you’re casting on a large number of stitches. I can count 20 stitches without losing my place much easier than I can count 400. So, after you cast on 20 sts, place a marker and repeat until you have the required number for your pattern. No miscounting here.

P.S. Here’s one last tip for all the hand spinners out there. Locking stitch markers make it much easier to measure the yardage of skeined handspun. 


Cuddly Chevron Baby Blanket Tutorials

1. Tips for Using Stitch Markers

2. Working lifted increases in garter stitch (January 27th)

3. Weaving in ends as you go without a tapestry needle (February 3rd)