Store Singles on Chopsticks

I love chopsticks. Have for years and I’ve got quite the collection now. I have chopsticks made of wood, plastic, metal, and ceramic. I have lacquered chopsticks, orange chopsticks, and red chopsticks. The collection has chopsticks that say Happy Birthday, that are inlayed with Mother of Pearl, and others that are decorated with ukiyo-e samurai. I took a selection of these off to college with me. Based on the look on my roommate’s face, you’d think eating fruit cups with chopsticks was weird or something. Also part of the collection are several sets of plain, black chopsticks. They sat in the silverware drawer for years and I always picked more decorative pairs instead. Well, I found a much better use for those plain jane chopsticks: storing singles.

Chopsticks1.jpg

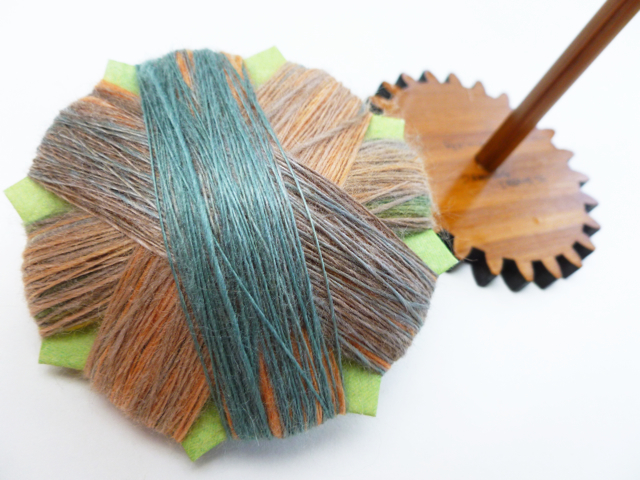
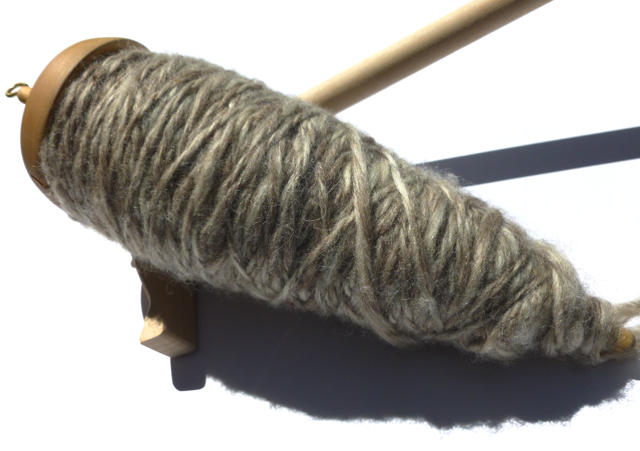
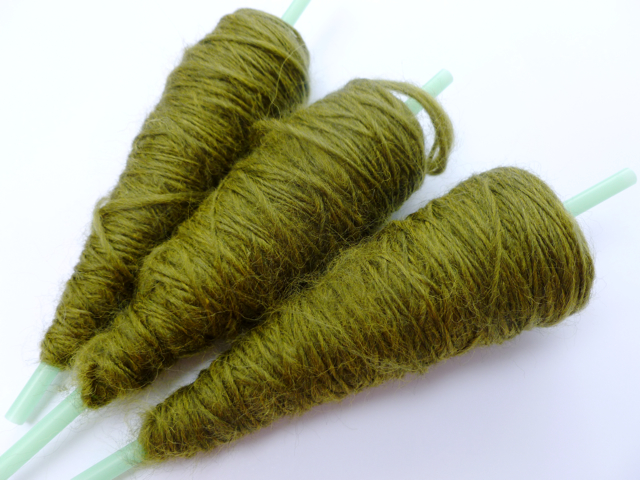
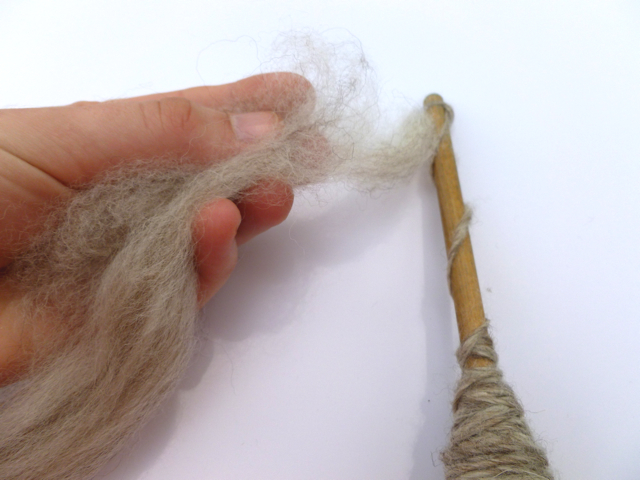
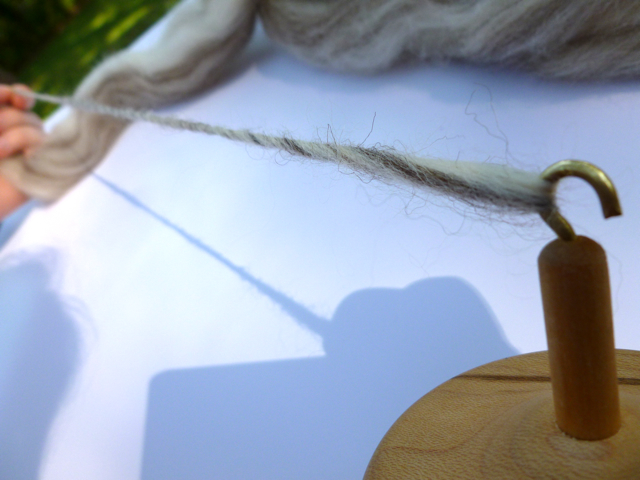
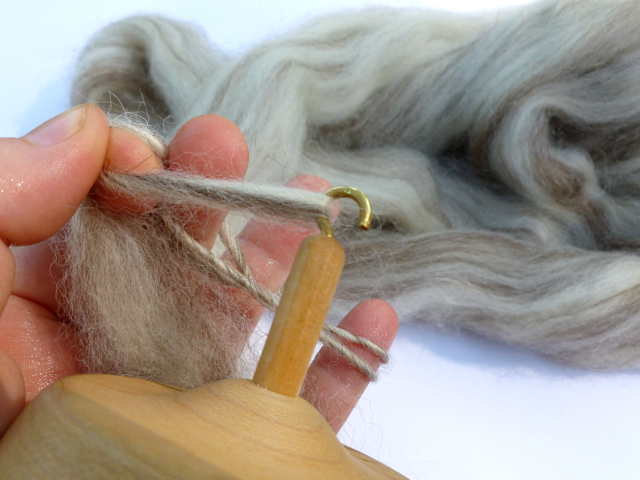
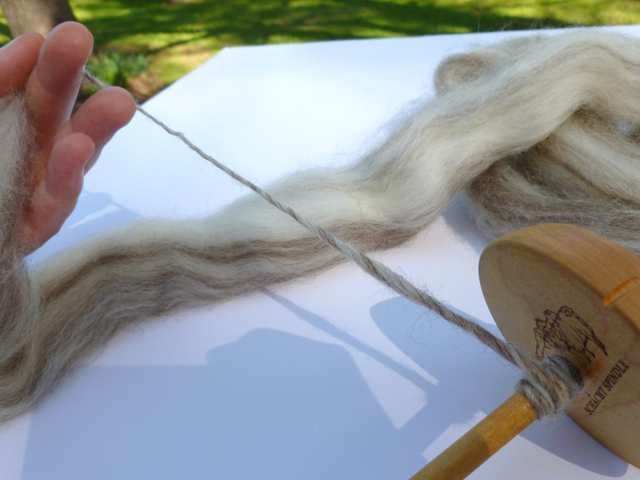
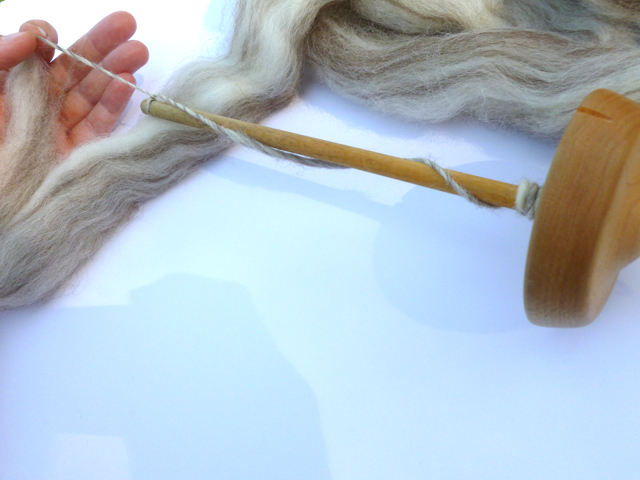
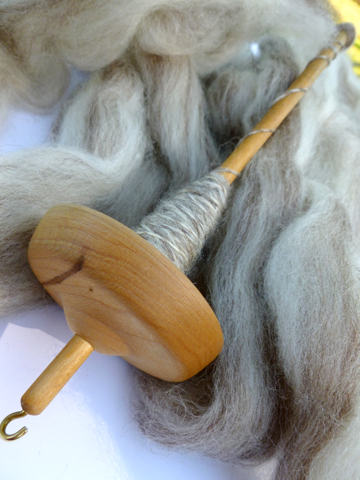
A chopstick and the shaft of a spindle aren’t that different. The two share similar and compatible lengths and diameters. Both have been sanded, perhaps finished with paint or stain, and are smooth to the touch. A finished cop - the mass of single wrapped around the shaft - slides easily without snags or tangles along both. A chopstick is more durable than a straw and can even be used as part of an improvised lazy kate. As a bonus, chopsticks are fairly cheap and come in a range of styles so you can afford to pair up all your spindles with a few sets.

Chopsticks3.jpg

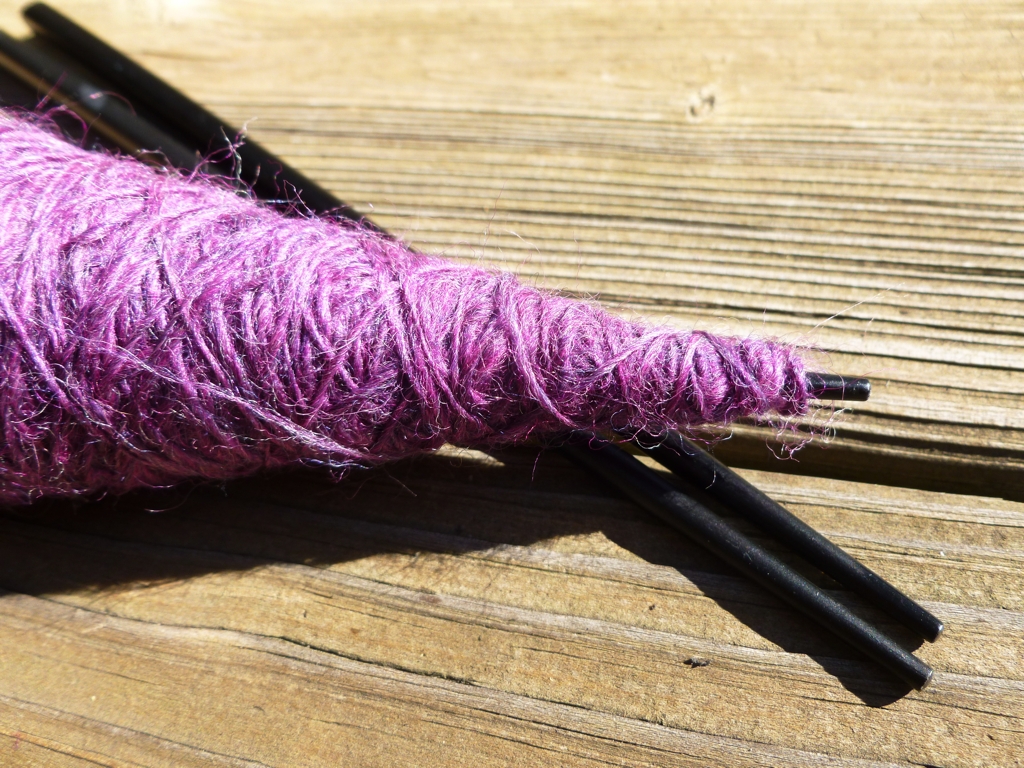
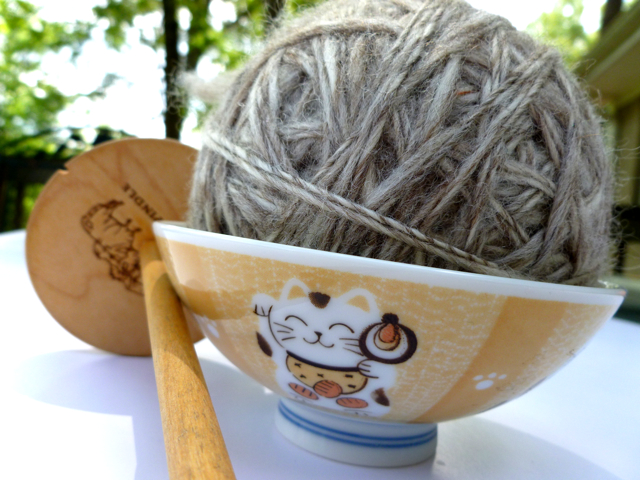
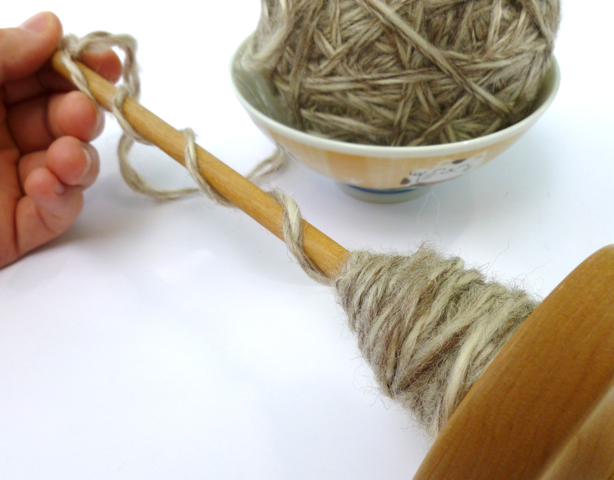
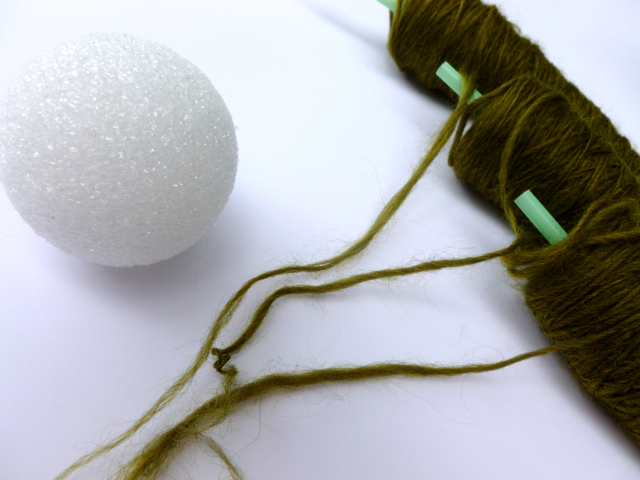
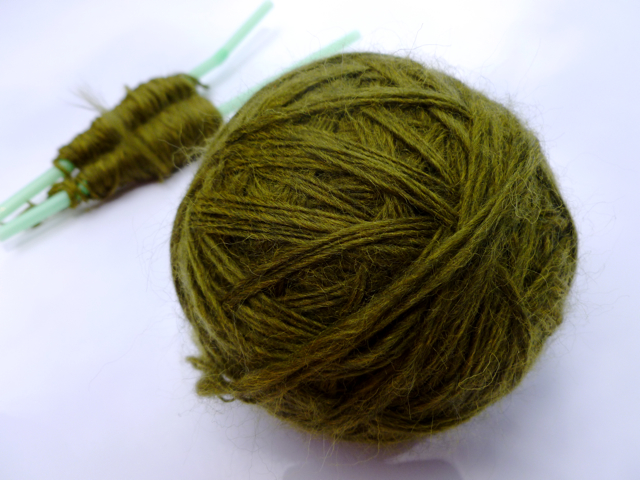
To transfer, all you have to do is slide the cop off the spindle and on to the chopstick. If the spindle has a tapered shaft, slide the cop onto a straw first and then the chopstick so that the diameters match. With the chopstick full of proto-yarn, the spindle is free and clear for more spinning.

Origami for Plying

Since I started seriously learning to spin, I have been monogamous spinner. Just one bump of fiber on the spindles at a time, thank you. I don’t want to confuse my hands with wildly different fibers and jump between lace and worsted weight all in the same day. So when I pick some fiber to spin, I see it through to the end and don’t start something new until the yarn is drying on the rack. For the past few weeks my default spinning project has been a lovely bunch of lace weight singles which are be chain plied for some self-striping goodness. The time had finally come to ply the first singles a few days ago but I only had one plying ball and two singles. I didn’t want to wrap both singles around the same ball since I wouldn’t know where one ended and another began. One single went on the ball and I wrapped the second around a box of sewing pins. That box kept the singles orderly but it wasn’t quiet about it. “Oh, you need more singles? I shall play you the song of my people.”

Until I get around to knitting up a few more plying balls, origami to rescue. I love making modular origami where a bunch of simple folded pieces combine to create something wonderful and complex. Stars are a particular favorite. In the rare moments of silent plying, I remembered the Gudrun Star over on GoOrigami.com. I’ve made them before and they seemed perfect for holding bits of handspun. The stars are simple to make, easy to memorize, and don't take up much space. I made these units listening to podcasts and watching movies.

I know I could have just cut out a few squares of card board instead of folding stars but there is a method to my madness. The extra points make it easier to wrap and secure the yarn. Plus, I’m going to be using these stars a lot and I’d rather look at them than a drab piece of cardboard or an advertisement on the back of a cereal box.

To make your own stars, you’ll need the Gudrun Star diagram from GoOrigami.com and a sheet of scrapbook paper cut into 2 x 3” rectangles. Scrapbook paper is thicker than origami paper but still easy to fold and makes a sturdy star too. One sheet is enough to make 3 stars 3.25” across. FYI, the diagram is in German but the illustrations are clear without the words. Don’t forget that Google Translate is your friend if you need it. 

Once you’ve made your stars, they’re ready for yarn. Hold the end in a valley and wrap the yarn around the opposite side of the star 3 or 4 times. Rotate and repeat. When you can’t see the points anymore, you can wrap the yarn just like on any other ball.

Wrapped and ready to go! Time for some plying that won’t outdo the television speakers. 

How To Ply Yarn

...or Process Part 5 of Spinning Yarn on a Spindle. Part 1. Part 2. Part 3. Part 4.

| - | - | - | - |

After how much time it took my hands to learn how to draft fiber and flick a spindle, plying yarn seemed like such a simple thing. Put two or more singles together (or one single that’s been doubled or tripled) and spin them together counter-clockwise to make one intertwined strand. That’s it. The only thing I had to think about was how much twist to add. It seemed so much simpler than spinning up the singles but I knew there was more to it. At the same, I wasn’t worried about the details because I knew I’d figure them out eventually.

So, if you’re worried about ruining your singles, just jump in and go for it. As long as you ply opposite the singles and add enough twist, you’re golden.  

A spindle, 2-ply plying ball, and a bowl for wrangling.

Tie the singles together in a knot. If you’re using a top whorl spindle, slip the hook between the plies. For a bottom whorl, tie the singles around the shaft.

Flick the spindle counter-clockwise to add twist since singles are typically spun clockwise.

Once there’s at least an arm’s length of yarn and you’re happy with the amount of twist, wrap the yarn around the shaft. Bring the yarn back around to the hook or tie a slip knot and leave just yarn enough free to get the spindle going again. 

Repeat until you have one very full spindle and all the singles are plied. Woot!

To get your new yarn off the spindle and into a skein, you can wrap the yarn around your arm from palm to wrist or use a niddy noddy. Add a few ties around the skein to keep it from tangling.

Wash the skein to set the twist (I like Eucalan for this part) and hang it up to dry after a few good thwacks.  In this case, a thwack is pulling at both ends of the skein to make the fibers bloom and even out the twist. You don’t have to be about it gentle either. 

Ready to knit.

Now that I’ve gotten a little more practice under my belt, I’m beginning to see more of the nuances of plying. I’m refining my technique and experimenting with different methods (chain plying, anyone?). I’m making yarn that I love and can’t wait to knit with once I find that perfect pattern. This never would have happened I hadn’t thrown caution to the wind, and just tried in the first place. The first skein isn’t perfect but it’s still yarn and a first step.

How to Wind a Plying Ball

Plying Ball.jpeg

...or Process Part 4 of Spinning Yarn on a Spindle. Part 1. Part 2. Part 3.

| - | - | - | - |

I have finally finished plying all three singles for my little experiment making a 3-ply yarn. The first single flew off my spindle. The second single ate all my mojo. The third single brought back my mojo with some to spare. I used a smaller spindle that weighs just over an ounce and is just the right size to slide the cop - the mass of single or plied yarn wrapped around the shaft - off to a straw.

It’s really funny how quickly a new tool can change a process. My first favorite spindle weighs 2.2 oz and has a shaft too large to slide a straw over. Every time I finished a single, I’d let it rest overnight and then wind the single onto a small dowel (a ball would work too). It’s more time consuming but worth the effort to get an empty spindle.

Trying to ply three separate singles from three separate straws is just a recipe for disaster but all three plies on a single ball is much more manageable. This method also works well with two singles but I’d hesitate to wrap more than four since it would be harder to keep all the strands evenly tensioned. Also, just wrapping a single around a ball would be a nice way to store it for later since the ball is an easy and tangle free way to start wrapping. 

I’m using a styrofoam ball since I have them on hand but tennis balls and felted beads work too.

Gather up all your ends and start wrapping. A pail or box will keep the singles from running off to the four corners of the world. 

Keep wrapping until you come to the end of a single and cut the rest to match. If you have extra like I do, you can wind them onto another ball to make a cute little mini skein. 

Next up, plying!

Fixing Breaks and Making Joins

...or Process Part 3 of Spinning Yarn on a Spindle. Part 1. Part 2

There are days when spinning comes easy. I can pick up the spindle and find my rhythm immediately. Yarn just seems to spring from my fingers and all I have to do is wind it on the spindle before things touch the ground. The only time I have to make a join is when I need more fiber. I’m in the zone. 

Then are days where the spindle drops every 30 seconds and I’ve got a pile of loose, under spun fiber that couldn’t hold a paperclip off the ground. Bah. Once I get so frustrated that I want to jumble up everything into a giant felted ball, I put the spindle down and walk away. Better to calmly fix something the next day than rip it to shreds in frustration. Thankfully, fixing breaks isn’t a difficult, drawn out process.

| - | - | - | - |

When it’s time for more fiber, fan out the end of the fiber coming off the spindle and the end of the new fiber.

Overlap the two ends by about 3” and start drafting and adding twist. If you just add twist without drafting the join will be lumpy and bulkier than the surrounding single.

Keep spinning and keep joining and, soon enough, you’ll have a full spindle. 

| - | - | - | - |

Joining new fiber and fixing a broken single on a spindle are, essentially, the same process. Usually, a single breaks because there isn’t enough twist to hold it together. The ends won’t immediately untwist and become a frazzled mess but they won’t always salvageable. Sometimes, you just have to pull out the weak parts and get back to business. When joining two ends of single back together, just overlap the ends by about 6 to 12” and add more twist. Wind the join onto the spindle and keep going. That’s all there is to it.

If you have a broken single and need to join it a bit of un-spun fiber, draft out the fiber and overlap the two pieces by 12”. Wind yarn off the spindle to work with if need be. “Park and Draft” is your best friend here since it lets you slowly add twist and test the join to see if it holds. Plus, it might be more difficult to draft if the single was tightly spun. 

Good luck and don’t be afraid of a little practice.

How To Start Spinning Without A Leader

If this post could have a subtitle, it would be Process: Part 2. This series has taken a complete 180 from what I thought it was going to be. Take a few pretty photos of my process, write a few snippets, wax poetic about the whole thing, and put it on the blog. Turns out, I was making tutorials and didn’t even know it. I think this a lot better than my original idea.  

The first post in this series was all about how to prepare fiber (combed top in this case) for spinning. In this post I’m getting down to business of spinning, well, starting to spin yarn without a leader. I’ve used a leader in the past but there is something magical about making yarn out of thin air. Just add a bit of twist to some fiber and BAM! Yarn. Plus, drafting and spinning this short section of fiber helps me understand the characteristics of an individual batch of fiber which helps me spin better yarn.

| - | - | - | - |

The great thing about about starting without a leader, a length of already spun yarn that helps put twist in fiber at the beginning of the spinning process, is that you don’t need any extra material to pull it off. Also, if you’re a beginner and can get started without the leader, you’ll already have the basics of spinning under your belt.

To start, you’ll need a drop spindle - high or low whorl - with a hook and a bit of fiber. 

Pick an end and slowly pull the fibers straight out bit by bit using both hands. One hand pulls and the other holds the top. The top between your hands should get thinner and longer. This is drafting.  You can draft out just a few inches now and start spinning, drafting as you go, or draft large sections now to make it easier to handle.

Once at least 6” have been drafted, it’s time to put the fiber on the spindle. Place the drafted fiber through the hook and fold back the first 2-3” to form a loop. Pinch the two ends together. When you pick the spindle up by the fiber, it should hang without falling.

Time for twist! Singles, un-plied yarn, are traditionally spun in a clockwise direction and plied together counter-clockwise. So, give your spindle a clockwise spin - rotating to the left - with your fingers. There should be so much twist that the fiber kinks up on itself. To keep the spindle from spinning back and removing all the twist, catch it in your hand and hold it between your thighs. 

Loosen your grip and slowly pull back the hand pinching the fiber to let the twist move into more and more of the drafted fiber. If the newly spun single starts to give out, give the spindle a few more turns to add more twist.

Once there’s 1 to 2’ of single on the spindle, wrap it around your pinching hand until you get back to the hook. Keeping your fingers pinched and the everything tight, carefully take the single off the hook.

Wrap the single around the shaft close to the whorl. A few wraps should keep everything in place. 

If spinning on a low whorl spindle, wrap the single around the shaft and tie it off with a half hitch or pass through a hook. For a high whorl spindle, just pull it up over the whorl so that it comes up behind and then through the hook.

All there is to do now to keep spinning, is repeat the process with both hands this time. Pinch. Twist. Draft. Pinch. Twist. Draft.

This video by Abby Franquemont and this one from TheArtofMegan.com really helped me get handle on the process. Of course, there’s no substitute for actual practice.

| - | - | - | - |

Up next in the Process Series, is joining fiber and fixing breaks.

How to Spin Yarn: Prepping Combed Top

I can haz process?

Picking up spinning again was a lot like any other skill I’m trying to learn. First, I find this thing that sounds really cool and I would like to try. Prime examples: knitting, kumihimo, temari, origami, and bookbinding. Second, I hit the internet and research tools, tutorials, and techniques for days, weeks, and even months before I decide to make something a priority. Third, gather supplies. Fourth, actually do something. Anything to just get started. 

If I like that brand new started something, I keep doing it. I figure out how and why it works. I start experimenting. I get comfortable. I develop a process of how to do this awesome something from start to finish. With spinning, the realization that I knew what I was doing and that I had a process hit me all at once. I was absolutely giddy.  

So, I’m sharing my process. I hope that it will help you get started, come up with one of your own or, if you already know how to spin, see your process as something amazing and worth celebrating. 

| - | - | - | - |

Step 1: Stash Diving. Since my first, short-lived attempt at spindle spinning, I’ve been buying fiber. Not much. Just enough to have something to choose from when I came back to the spindle. The stash has served me well in that regard. For this attempt, I picked out 4 oz. of Blue Face Swirl (Naked) from Gale’s Art.

Step 2: Inspection. This batch of fiber was twisted up like a skein of yarn. So, I opened it up just like a skein of yarn. Then I spread everything out and got a sense of the color distribution and how much 4 oz. of fiber actually looks like.

Step 3: Division. I didn’t pick out this fiber with any particular project in mind. I just wanted to try my hand at a 2-ply yarn. So, I split the entire length of combed top down the middle. 

Step 4: Wrangling. There’s a brief pause for a little “eeny, meeny, miny, moe” to decide which half to use first. The “not it” bit is crochet chained to keep it whole and safe until I need it. I take one end, make a loop, and tuck in the tail to make a big circle.

Next, pull a loop through the circle. Pull a new loop loosely through the last loop and continue. Eventually, all the roving is gathered up and easy to handle. At the end, I just pull the roving through the last loop to keep it together. This is the only bit of crochet I know.

That giant circle I made at the beginning? That’s how I know to work from the opposite end since a crochet chain can only be pulled out from the end and not the beginning. Just pull the tail out and and take apart the chain as you need it.

| - | - | - | - |

Next post, I’ll get back to the other half of the fiber and start spinning.